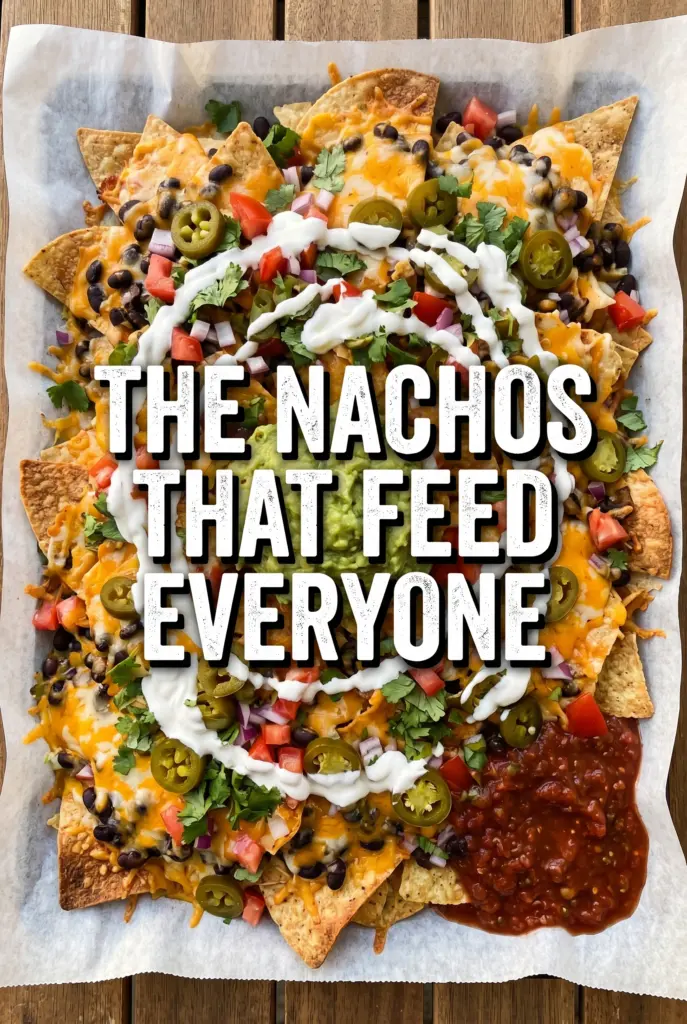
Layered nachos disappear fast when the chips stay crisp, the cheese melts into every pocket, and the toppings land in the right order. That’s what makes this version worth keeping on repeat: you get enough structure for a party tray, but it still comes together in about 20 minutes with ingredients that already make sense together.
The trick is spreading the chips in a single layer and using the cheese twice. A little cheese goes down first so the beef and beans have something to cling to, then the rest goes on top to seal everything into one melty layer. Broiling for a few minutes is enough, but only if you keep the pan close enough to the heat to melt the cheese before the chips start drying out.
Below you’ll find the one timing detail that keeps the nachos from turning soggy, plus a few smart swaps for making them meatless, spicier, or better for a crowd.
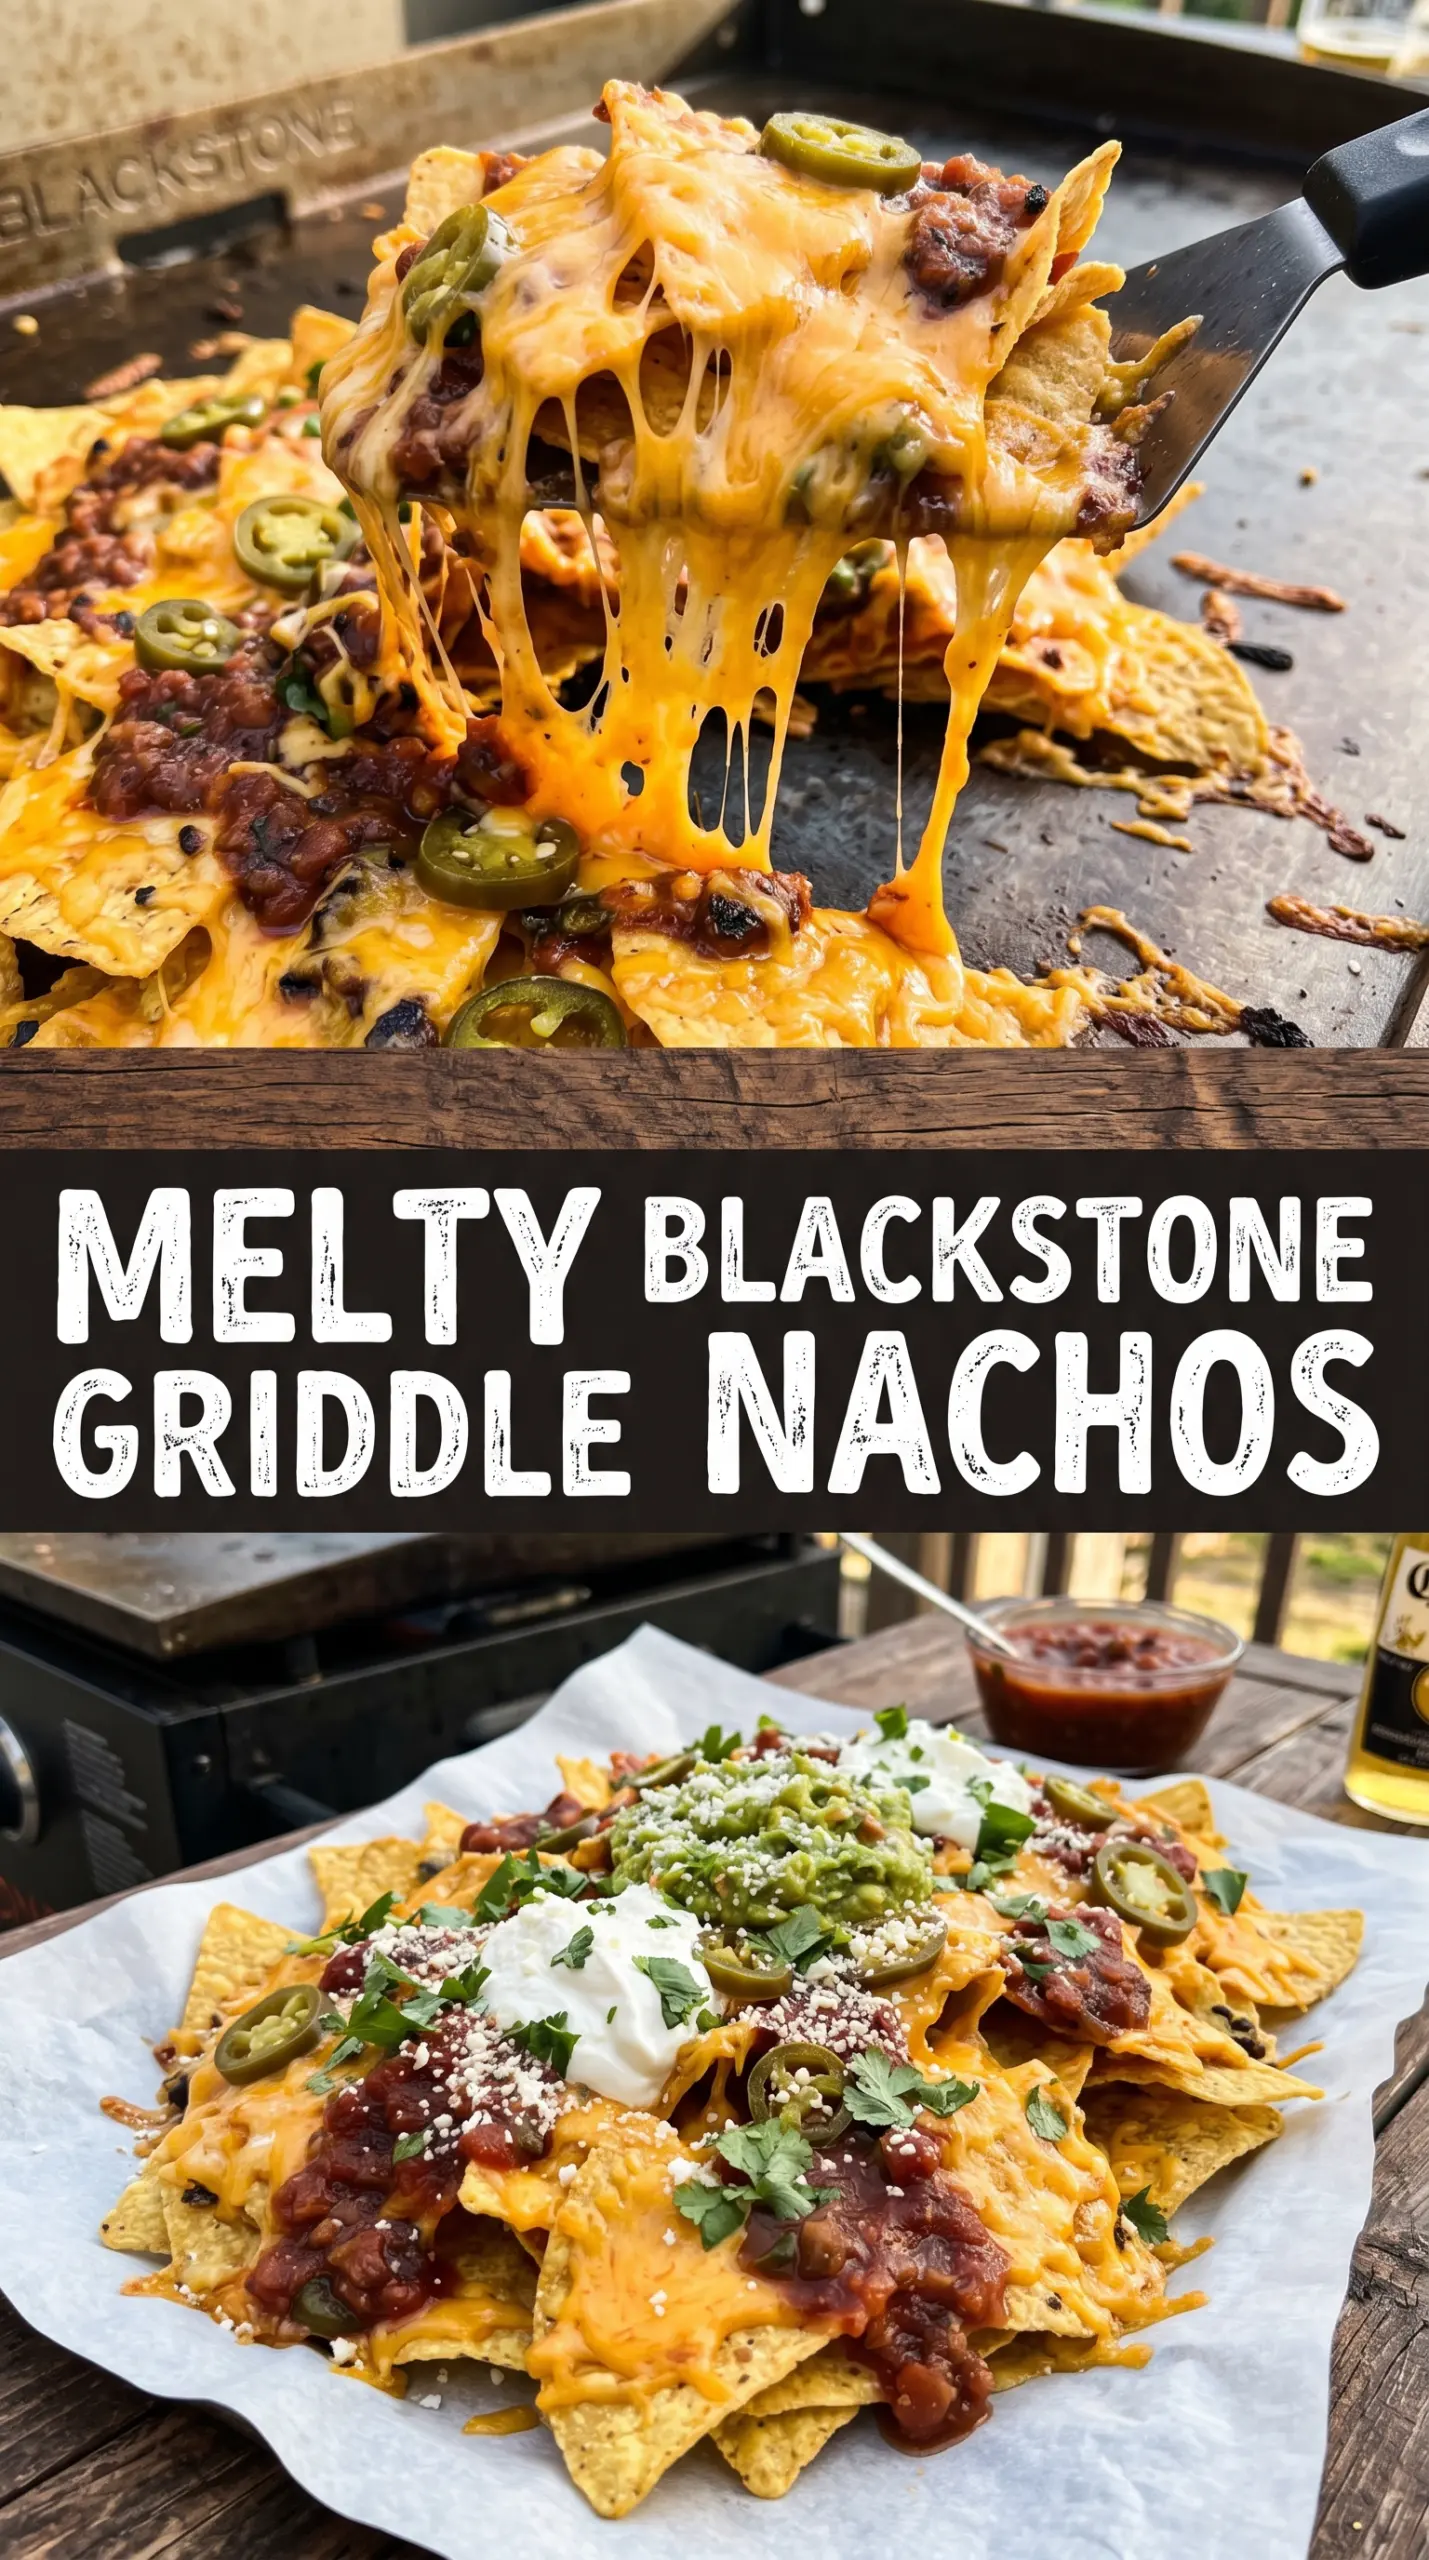
The cheese melted into every layer and the chips stayed crisp underneath, even after I added the beef and black beans. I used the broiler for just 4 minutes and it came out perfectly bubbly.
Save these loaded nachos for game day, game night, or any time you want a hot tray with crisp chips and a proper cheese pull.
Why the Chips Go Stale Before the Cheese Even Melts
The fastest way to ruin nachos is piling everything on too early or too thick. Chips trap steam the second they’re buried under hot toppings, and the bottom layer turns soft before the cheese on top has even had a chance to melt. A broad baking sheet matters more than most people think because it gives the heat room to move and keeps the chips in a loose, even layer.
Broiling works here because it melts the cheese quickly without baking the whole tray long enough to dry it out. If your broiler runs hot, stay close and watch for the exact moment the cheese gets glossy and starts bubbling at the edges. That’s your cue to pull the tray, not wait for deep browning.
- Use a large baking sheet — A crowded pan creates steam. If the chips overlap heavily, the ones underneath soften instead of staying crisp.
- Split the cheese — Half under the toppings helps anchor the filling; the rest on top seals everything together.
- Keep wet toppings for the end — Tomatoes, sour cream, guacamole, and salsa belong on after broiling so they don’t water down the tray.
What Each Topping Is Doing in This Tray
The ingredient list here is built for balance, not just volume. The cheese melts into the chips and holds the whole tray together, while the beef and black beans give enough heft that this eats like a full appetizer instead of a bowl of broken chips. Everything after the broil is there for contrast: cool sour cream, creamy guacamole, bright salsa, and the sharp hit of lime.
- Tortilla chips — Thick, sturdy chips hold up best under the toppings. Thin chips taste fine, but they break faster and soften sooner.
- Mexican cheese blend — This melts smoothly because it usually combines cheeses with different melting points. Pre-shredded works here, though freshly shredded melts a little more evenly if you have the time.
- Ground beef and taco seasoning — The beef gives the nachos their savory backbone. Drain off excess grease after browning if it looks oily, or the tray can turn slick.
- Black beans — They add body and make the nachos feel more substantial. Rinse them well so they don’t bring a canned taste or extra liquid.
- Jalapeños, tomatoes, olives, cilantro, lime — These finish the tray with heat, acidity, salt, and freshness. Don’t skip the lime; that squeeze wakes up everything underneath it.
Assembling the Tray So Every Bite Gets Toppings
Brown the Beef First
Cook the ground beef in a skillet until it’s no longer pink and the browned bits start to form on the bottom of the pan. That browning is where the flavor comes from, so don’t rush it by cranking the heat too high and steaming the meat instead. Once the taco seasoning goes in, cook it the way the packet directs so the spices bloom and cling to the beef instead of tasting raw.
Build the Base in One Even Layer
Spread the chips across the baking sheet so they overlap as little as possible. Then add half the cheese, followed by the beef, black beans, and jalapeños. If you dump everything in one thick mound, the center will melt into a mess while the edges stay bare.
Broil Until the Cheese Turns Glossy
Slide the tray under the broiler for 3 to 5 minutes. Watch for the cheese to melt completely and bubble in spots; that’s the sign it’s ready. If you leave it under there too long, the chips around the edge can scorch before the center gets properly melted.
Finish While the Cheese Is Still Hot
Top the nachos immediately with tomatoes, olives, sour cream, guacamole, salsa, and cilantro. The heat from the tray loosens the cold toppings just enough without cooking them, which is what keeps the whole thing tasting fresh. Serve with lime wedges right away so everyone gets that bright finish at the table.
How to Adapt These Nachos for a Different Crowd
Make Them Vegetarian Without Losing the Heft
Skip the beef and add extra black beans, or swap in seasoned crumbled tofu or plant-based ground. The key is keeping enough savory filling that the chips don’t feel naked under the cheese. If you use only vegetables, the tray tastes lighter but won’t have the same rich, loaded feel.
Turn Up the Heat
Use hot jalapeños, add a pinch of cayenne to the beef, or finish with pickled hot peppers. Heat works best here when it’s layered, not dumped all at once, because the cool toppings need something to balance it. This version keeps the same structure but comes off sharper and more assertive.
Make Them Gluten-Free
Use certified gluten-free tortilla chips and check the taco seasoning packet before you start. Most of the toppings are naturally gluten-free, so this swap is mostly about making sure the seasoning blend doesn’t sneak in wheat-based fillers. The finished tray tastes the same, which makes this an easy adjustment.
Storage and Reheating
- Refrigerator: Store the components separately for up to 3 days. Fully assembled nachos get soft fast, especially once the cold toppings sit on top.
- Freezer: The beef freezes well, but the finished nachos don’t. Freeze the cooked seasoned beef on its own, then build fresh trays later.
- Reheating: Reheat the beef in a skillet or microwave until hot, then assemble a fresh tray and broil again. Don’t try to revive already topped nachos in the oven; the chips will dry out before the cheese comes back to life.
Answers to the Questions Worth Asking

Easy Nachos
Ingredients
Equipment
Method
- Brown the ground beef in a skillet over medium-high heat until no longer pink, then add the taco seasoning and cook according to the package directions.
- Keep stirring so the seasoning evenly coats the beef, and cook until the mixture thickens slightly, about 5–7 minutes.
- Spread the tortilla chips on a large baking sheet in an even layer so they lay flat for melting.
- Sprinkle half the shredded Mexican cheese blend over the chips to form a base layer.
- Add the seasoned beef, black beans, and sliced jalapeños in an even distribution over the cheese.
- Sprinkle the remaining cheese over the top for full coverage and a bubbling surface.
- Broil on high for 3-5 minutes, watching closely until the cheese is melted and bubbly.
- Remove from the oven and immediately top the nachos with diced tomatoes, sliced black olives, sour cream, guacamole, and salsa.
- Garnish with fresh cilantro and serve with lime wedges on the side.