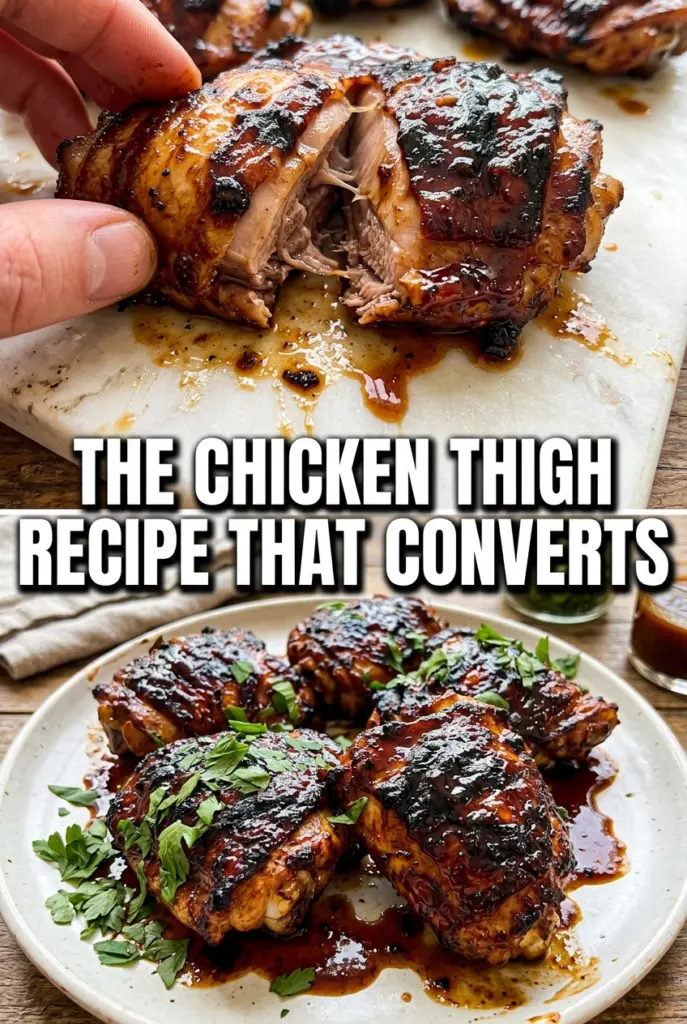
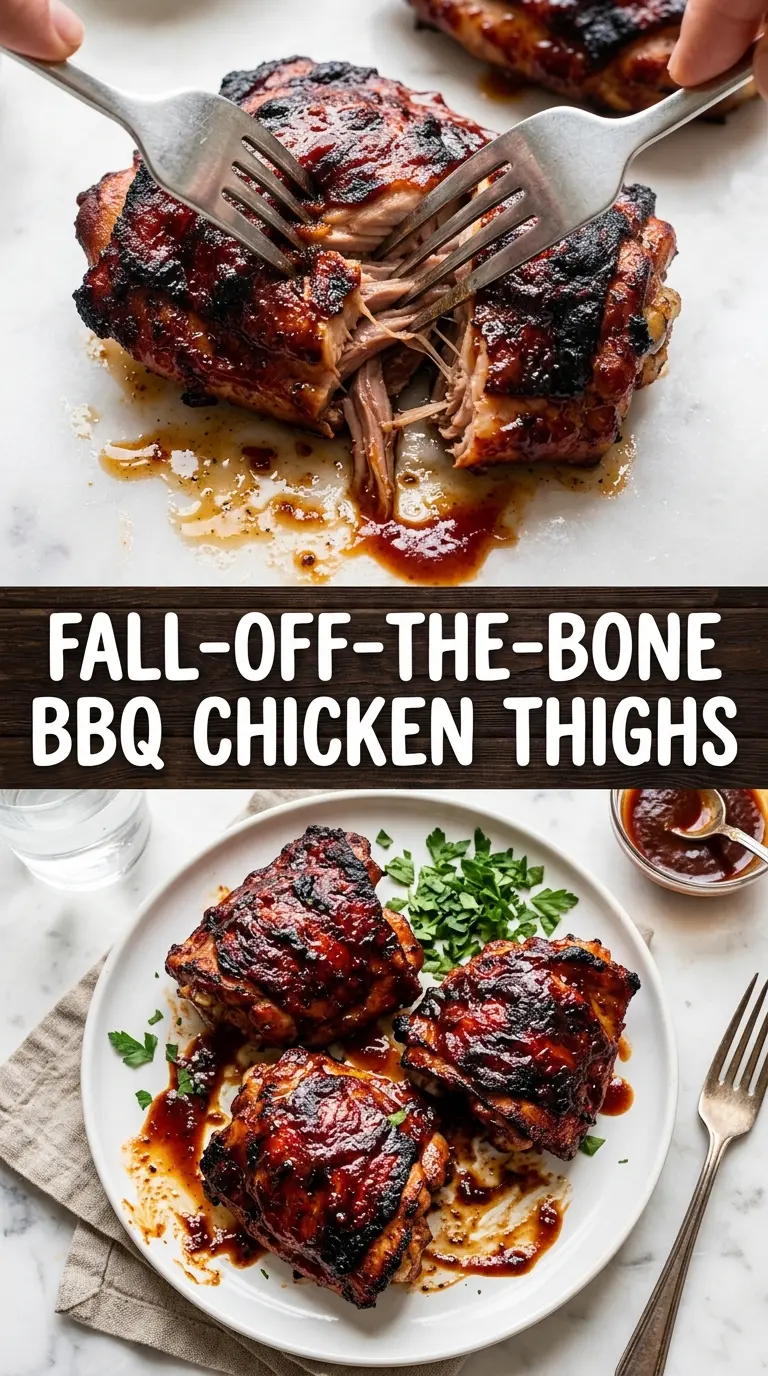
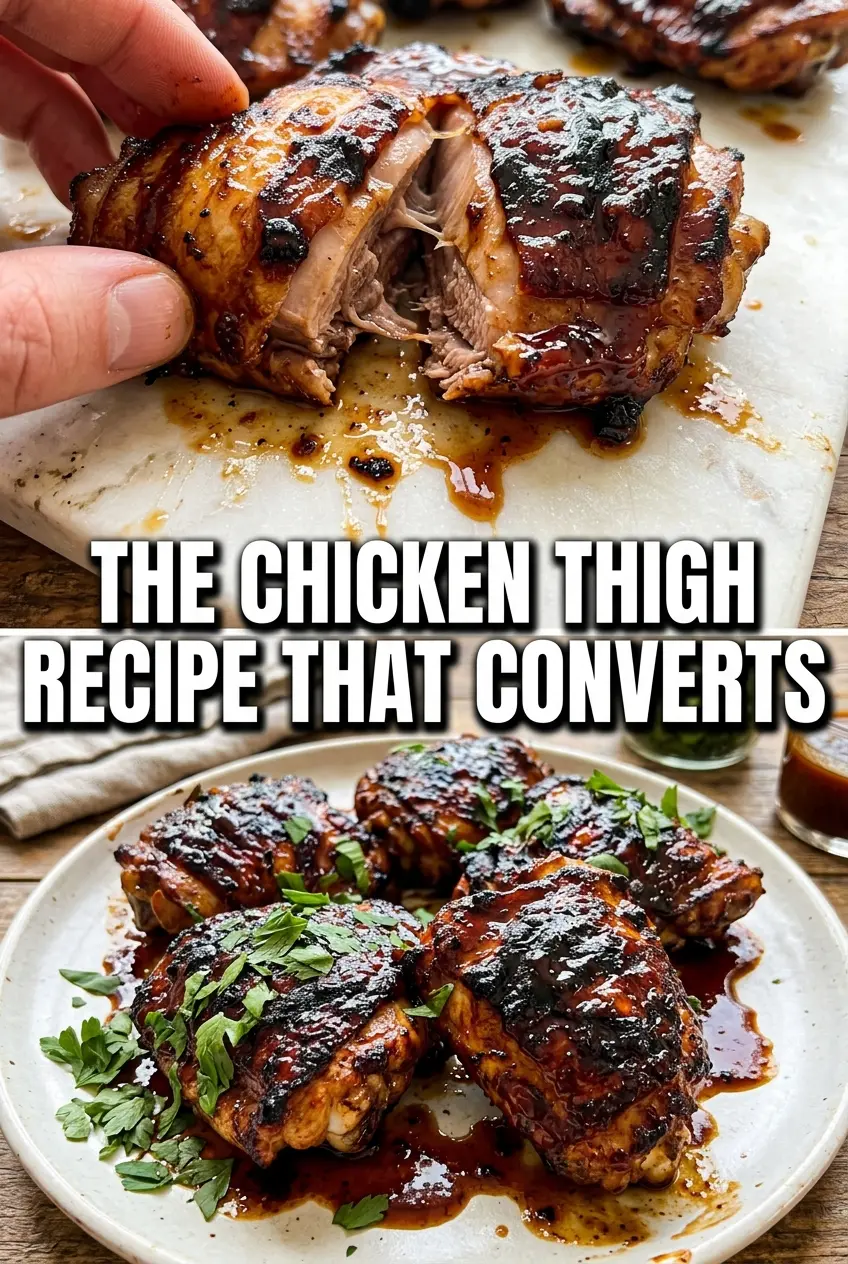
Caramelized BBQ chicken thighs bring together the two things people want most from grilled chicken: crackly skin and a sticky, smoky glaze that clings instead of sliding off. Bone-in thighs handle the grill better than lean cuts, so you get enough time to build color without drying out the meat. The brown sugar in the sauce helps that lacquered finish, while the vinegar keeps the sweetness from turning flat.
The trick is to let the skin do its work before the sauce ever touches the grill. If you sauce too early, the sugars scorch before the chicken is cooked through. A quick first grill over medium heat renders the fat and crisps the skin; then the sauce goes on in the last few minutes, where it can bubble and tighten into a shiny coating.
Below, I’ve included the timing cues I actually use when grilling thighs, plus a few swaps and storage notes for the nights when you want dinner to stay simple.
The skin got crisp before the sauce went on, and the brown sugar made this glossy caramelized finish that wasn’t burned at all. My husband kept picking pieces off the platter before dinner.
Like these caramelized BBQ chicken thighs? Save them to Pinterest for the nights when you want crispy skin and sticky sauce straight off the grill.
The Part That Stops the Sauce from Burning Before the Chicken Is Done
Chicken thighs are forgiving, but BBQ sauce isn’t. The sugar in the sauce needs a short, controlled finish on the grill, not a long cooking time from the beginning, or it turns bitter before the meat reaches temperature. That’s why the first stretch is all about skin and heat management, and the saucing happens only after the chicken has already picked up color.
The other mistake is crowding the grates. If the thighs are packed tight, they steam instead of crisp, and you lose the one advantage that makes dark meat worth grilling this way. Give each piece room and keep the heat at medium so the skin renders gradually instead of seizing up.
What the Sauce Ingredients Are Doing Here
- Bone-in, skin-on chicken thighs — This cut stays juicy through the longer grill time and gives you the crisp skin that makes the dish worth repeating. Boneless thighs work in a pinch, but they cook faster and don’t develop the same rich contrast between skin and meat.
- BBQ sauce — Use one you already like the taste of, because it becomes the base of the glaze. A thinner sauce is easier to brush on, but even a thicker one works if you loosen it slightly with the vinegar.
- Brown sugar — This is what helps the sauce caramelize and cling. If you skip it, the glaze will taste flatter and look more like barbecue sauce than a lacquered finish.
- Apple cider vinegar — A small amount keeps the sweetness in check and helps the sauce cut through the richness of the thighs. White vinegar works, but it tastes sharper and less rounded.
- Smoked paprika — This deepens the grilled flavor, especially if your grill doesn’t throw a lot of smoke. Regular paprika will work, but you’ll miss some of that warm, woodsy note.
How to Get Crisp Skin Before the Glaze Goes On
Seasoning the Thighs
Pat the chicken dry before anything else, then season it with salt, pepper, and olive oil. Dry skin is what crisps; wet skin steams. If the thighs go on the grill damp, the first few minutes are spent evaporating moisture instead of building color, and the skin won’t set properly.
Mixing the Glaze
Stir together the BBQ sauce, brown sugar, vinegar, and smoked paprika until the sugar dissolves as much as it can. You want a smooth, brushable sauce that will cling in a thin layer. If it looks grainy at this stage, keep stirring for another minute before it ever hits the heat.
Grilling for the First Color
Put the thighs skin-side down over medium heat and leave them alone long enough to render and brown, about 8 to 10 minutes. They should release more easily when the skin is ready; if they stick, give them another minute. Flipping too soon tears the skin and keeps you from getting that crisp base layer.
Finishing with Sauce
Once the thighs are nearly cooked through, brush on the glaze and return them to the grill for short bursts, turning and basting until the sauce looks shiny and darkened. Watch the edges closely because sugar can go from glossy to scorched fast. The chicken is done at 165°F, but the sauce should also look tightened and slightly tacky, not wet.
How to Adjust These BBQ Thighs for Different Cookouts
Spicier barbecue thighs
Add a pinch of cayenne or a spoonful of hot sauce to the glaze. That heat works best against the brown sugar, because it keeps the finish from tasting too sweet and gives the sauce a little more backbone.
Dairy-free and gluten-free without extra fuss
This recipe is already naturally dairy-free, and it can be gluten-free if your BBQ sauce is certified gluten-free. That’s the one ingredient worth checking carefully, since many bottled sauces use thickeners or soy sauce that can bring gluten in quietly.
Oven finish when the grill isn’t cooperating
Brown the thighs on the grill, then move them to a hot oven to finish cooking before glazing. This keeps the skin from burning if your grill runs hot, and you still get the caramelized top at the end.
Storage and Reheating
- Refrigerator: Store leftovers in an airtight container for up to 4 days. The skin won’t stay crisp, but the flavor deepens overnight.
- Freezer: Freeze the cooked thighs for up to 2 months, wrapped well and packed with as little air as possible. The sauce holds up better than the skin, so expect a softer texture after thawing.
- Reheating: Warm them in a 350°F oven, uncovered, until heated through. Microwaving makes the skin rubbery and can split the glaze, so use the oven if you want the best texture back.
Questions I Get Asked About This Recipe
Caramelized BBQ Chicken Thighs
Ingredients
Equipment
Method
- Season the chicken thighs with salt, pepper, and olive oil, coating the skin well so it crisps on the grill.
- Mix BBQ sauce, brown sugar, apple cider vinegar, and smoked paprika until the sugar dissolves and the sauce looks evenly colored.
- Preheat the grill to medium heat so you get grill marks without burning the sauce.
- Grill the chicken skin-side down for 8-10 minutes until the skin is visibly crisp and releases more easily from the grates.
- Flip the chicken and grill for another 8-10 minutes until the second side has grill marks.
- Brush generously with BBQ sauce and grill for 5 more minutes per side, basting frequently, until the sauce looks thick and caramelized.
- Continue grilling until the internal temperature reaches 165°F and the caramelized sauce clings in a glossy coat.