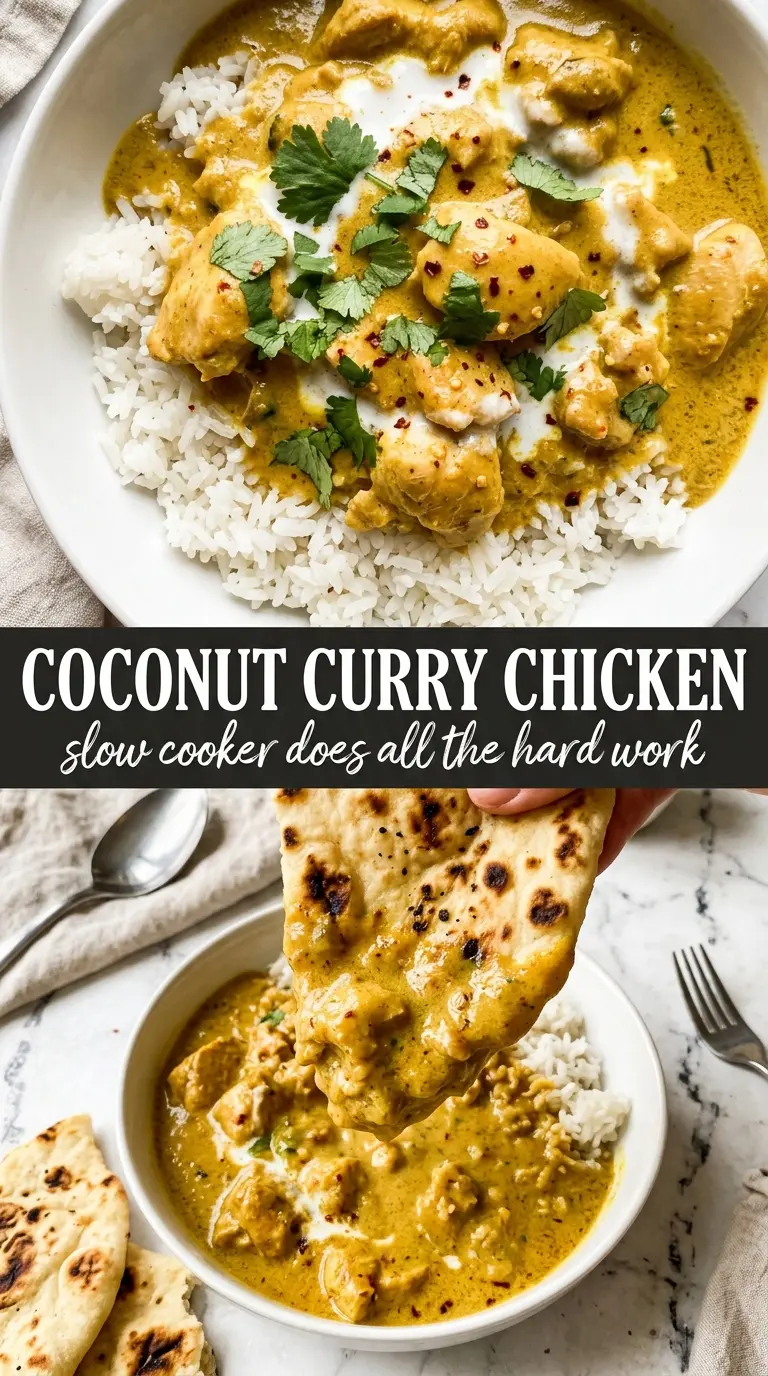
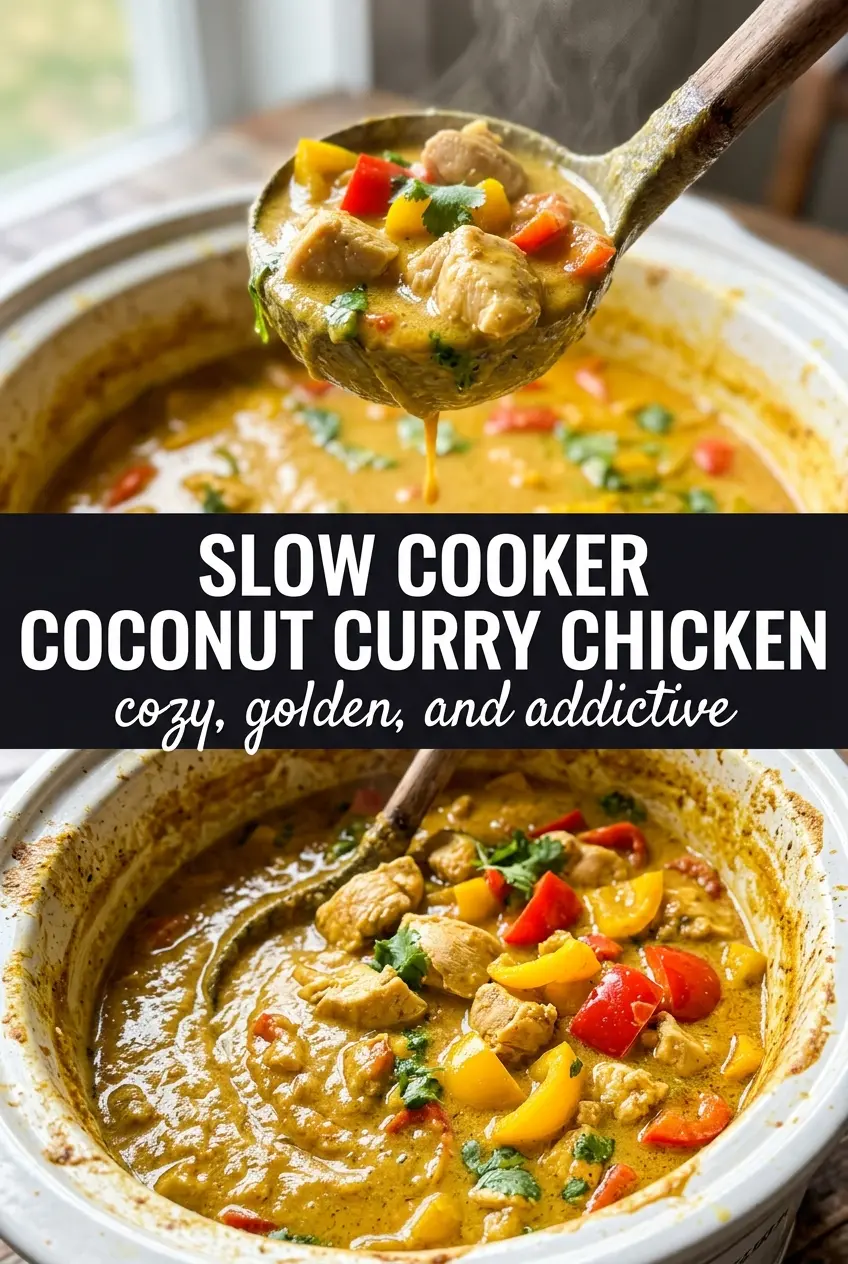
Silky coconut sauce, tender chicken thighs, and just enough red curry heat make this the kind of slow cooker dinner that disappears fast. The chicken turns spoon-tender without drying out, and the sauce settles into that sweet-savory balance that clings to rice instead of sliding off the plate.
What makes this version work is the order of ingredients. The coconut milk, broth, curry paste, and seasonings get whisked together first so the curry paste dissolves evenly, which keeps you from ending up with little pockets of raw spice. Chicken thighs hold up better than breasts in a long cook, and the peas go in at the end so they stay bright instead of turning dull and mushy.
Below you’ll find the one timing detail that keeps the sauce tasting fresh, plus a few ways to adjust the heat, richness, or sweetness without throwing the balance off.
The sauce came out silky and balanced, and the chicken was fall-apart tender after 6 hours on low. I added the peas at the end like you said, and they stayed bright instead of getting mushy.
Save this Slow Cooker Coconut Curry Chicken for a hands-off dinner with silky sauce, tender thighs, and bright basil on top.
The Trick to Keeping Coconut Curry Smooth in a Slow Cooker
The mistake most people make here is treating coconut milk like a last-minute finishing ingredient when it actually needs to be part of the cooking liquid from the start. Full-fat coconut milk gives this curry its body, and when it cooks slowly with the curry paste and broth, the sauce mellows instead of tasting sharp or one-note. If you add the paste straight onto the chicken, it can stay clumpy and overly intense in spots.
Chicken thighs matter for more than just tenderness. They stay juicy through a long cook and pick up the curry flavor without going stringy. The bell pepper can go in at the beginning because it softens into the sauce, but the peas belong at the end so they keep a little bite and don’t lose their color.
- Full-fat coconut milk — This is what gives the curry its creamy texture. Light coconut milk works in a pinch, but the sauce will be thinner and less lush.
- Red curry paste — It carries the heat, salt, and aromatics in one ingredient. Brands vary a lot, so taste your sauce before serving and add more only if you want a stronger curry punch.
- Chicken thighs — They handle the long cook better than chicken breasts. If you use breasts, they need less time and can dry out before the sauce finishes developing.
- Fish sauce and lime juice — These are the balance-makers. Fish sauce deepens the savory notes, while lime wakes everything up at the end so the curry doesn’t taste heavy.
What Each Ingredient Is Actually Doing in This Slow Cooker Chicken
- Chicken (boneless or bone-in) — Both work beautifully. Boneless finishes faster; bone-in creates richer broth. Cut evenly so pieces cook at the same rate.
- Sauce or liquid (cream, broth, or seasoned base) — This is what keeps the chicken moist during long cooking. Don’t skip it or the chicken gets dry.
- Aromatics (garlic, onion, herbs) — These mellow and sweeten during 6-8 hours of slow cooking. Mince finely so they distribute throughout.
- Seasonings (salt, spices, Italian seasoning) — Season boldly because slow cooking can mute flavors. Taste before serving and adjust if needed.
- Vegetables (if using) — Cut to size and layer them. Harder vegetables like potatoes go in first; softer ones later.
- Cheese (if using) — Add near the end so it melts smoothly. Cooking too long can make it separate or get grainy.
- Acid (lemon, lime, vinegar, wine) — This wakes up flavors that slow cooking can dull. Add in the last hour so the brightness doesn’t cook off.
- Low heat for 6-8 hours (the patience that pays off) — Low heat is gentler and more forgiving than high. The chicken stays tender and pulls apart easily.
Building the Curry So the Sauce Stays Balanced
Whisking the Base
Combine the coconut milk, curry paste, broth, garlic, ginger, fish sauce, brown sugar, lime juice, and turmeric until the mixture looks smooth and streak-free. That step matters because curry paste can settle in little lumps if it isn’t broken up first. The sauce should look a little thin at this stage; it thickens as the chicken cooks and the onion softens into it.
Starting the Slow Cook
Add the chicken, onion, and bell pepper to the slow cooker, then pour the sauce over the top so everything gets coated. The chicken doesn’t need to be submerged completely, but it should be mostly covered. If your slow cooker runs hot, check it near the end of the cook time; overcooking is what turns thighs from tender to stringy.
Finishing with Freshness
Stir in the peas during the last 20 minutes so they warm through without collapsing. Taste the curry before serving and adjust with extra lime juice for brightness, fish sauce for salt, or brown sugar if the curry paste brings more heat than you wanted. Serve it over jasmine rice while the sauce is still glossy and hot, then add Thai basil and lime wedges right at the table.
How to Adjust the Heat, Richness, or Make It Work for Your Pantry
Make It Dairy-Free Without Losing Creaminess
This recipe is already dairy-free as written, which is part of why the sauce stays so silky without any extra work. Stick with full-fat coconut milk, because that fat is what gives you the rich, spoon-coating texture.
Turn Down the Heat Without Flattening the Flavor
Use less curry paste if you want a milder curry, but don’t cut the ginger, garlic, or lime. Those ingredients keep the sauce lively even when the spice level drops, and the brown sugar helps round out the edges.
Swap the Chicken for a Vegetarian Version
Use cubed extra-firm tofu or chickpeas instead of chicken, and add them in the last hour so they don’t fall apart. The curry will taste slightly lighter and less rich than the chicken version, but the coconut base still gives it plenty of body.
What to Do if You Want a Thicker Sauce
Leave the lid cracked for the last 20 to 30 minutes so some of the liquid can evaporate. If the sauce still feels loose, let it sit for 10 minutes after cooking; it thickens a little as it rests.
Storage and Reheating
- Refrigerator: Store in an airtight container for up to 4 days. The sauce will thicken as it chills, which is normal.
- Freezer: It freezes well for up to 2 months. Cool it completely first, then freeze in portions; the coconut sauce may separate a little when thawed, but it comes back together with gentle reheating.
- Reheating: Warm it slowly on the stove or in the microwave at medium power, stirring now and then. High heat can split the coconut sauce, so keep the heat low and add a splash of broth if it looks too tight.
Questions I Get Asked About This Recipe
Slow Cooker Coconut Curry Chicken
Ingredients
Equipment
Method
- Add the chicken thigh chunks to the slow cooker.
- Whisk together coconut milk, red curry paste, chicken broth, garlic, ginger, fish sauce, brown sugar, lime juice, and turmeric until smooth.
- Pour the sauce over the chicken, then stir in the diced onion and sliced red bell pepper.
- Cook on LOW for 6–7 hours, or HIGH for 3 hours, until the chicken is very tender.
- Stir in the frozen peas during the last 20 minutes of cooking.
- Taste the curry and adjust seasoning with additional fish sauce, lime juice, or brown sugar as needed.
- Serve the curry over jasmine rice topped with fresh Thai basil and lime wedges.