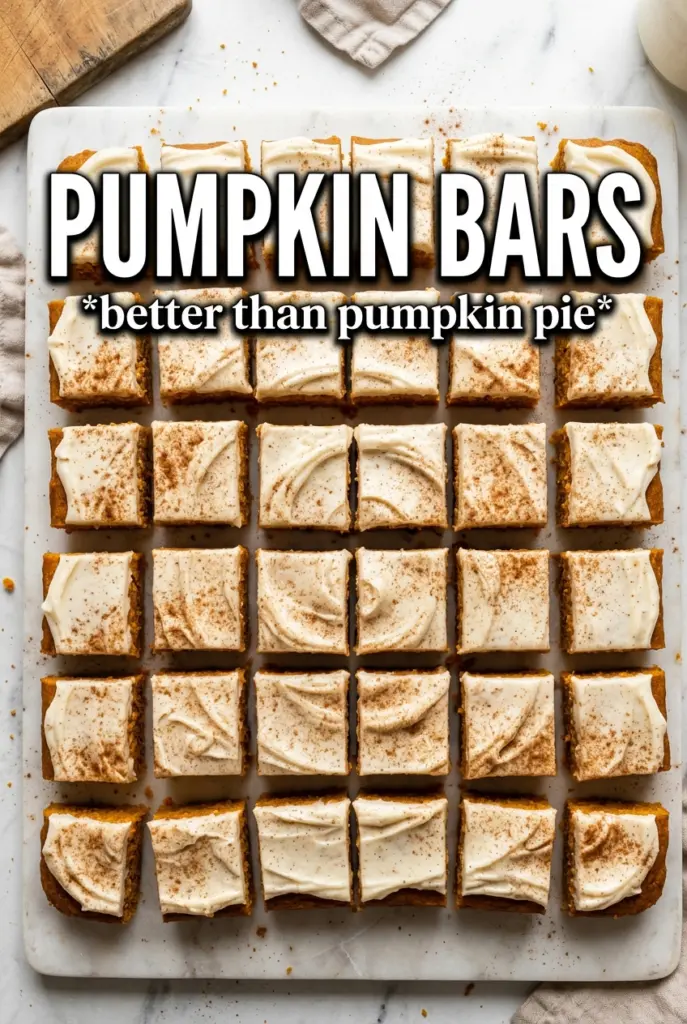
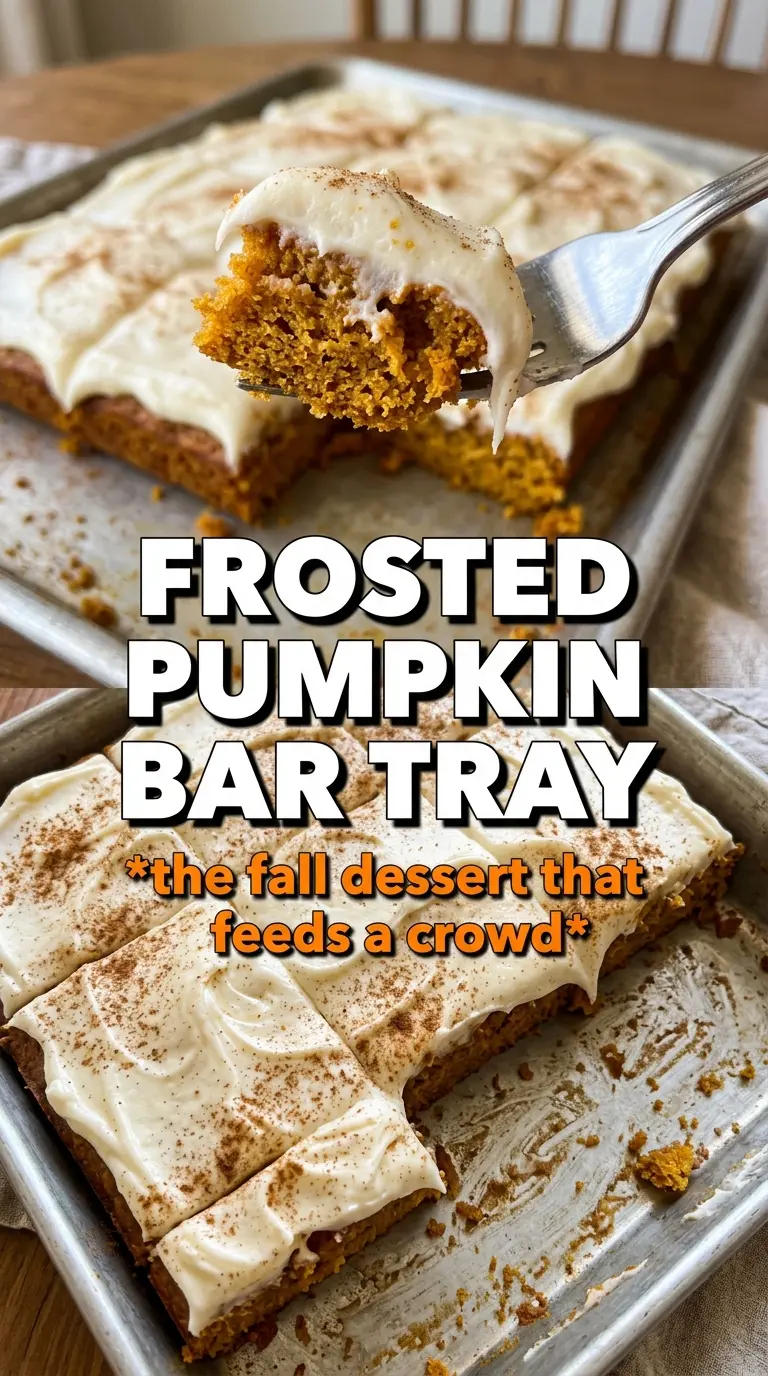
Pumpkin bars bake up tender, moist, and fragrant, with a soft crumb that stays plush under a thick layer of cream cheese frosting. The best versions are the ones that slice cleanly but still taste like a cross between a spice cake and a bakery-style bar cookie, and that’s exactly what this pan delivers. You get warm cinnamon, pumpkin pie spice, and just enough sweetness to make the frosting taste like the finish, not the whole show.
This version works because the batter is mixed just enough to bring everything together. Pumpkin puree adds moisture, oil keeps the crumb soft for days, and the pan size matters: a 15×10 jelly roll pan gives you bars that bake through without turning dry at the edges. The frosting is built with cream cheese and butter for a spreadable texture that holds its shape after chilling, which means the bars cut into neat squares instead of smearing across the knife.
Below, I’ve included the little details that keep the crumb tender and the frosting smooth, plus a few swaps if you need to adjust for what’s in your kitchen.
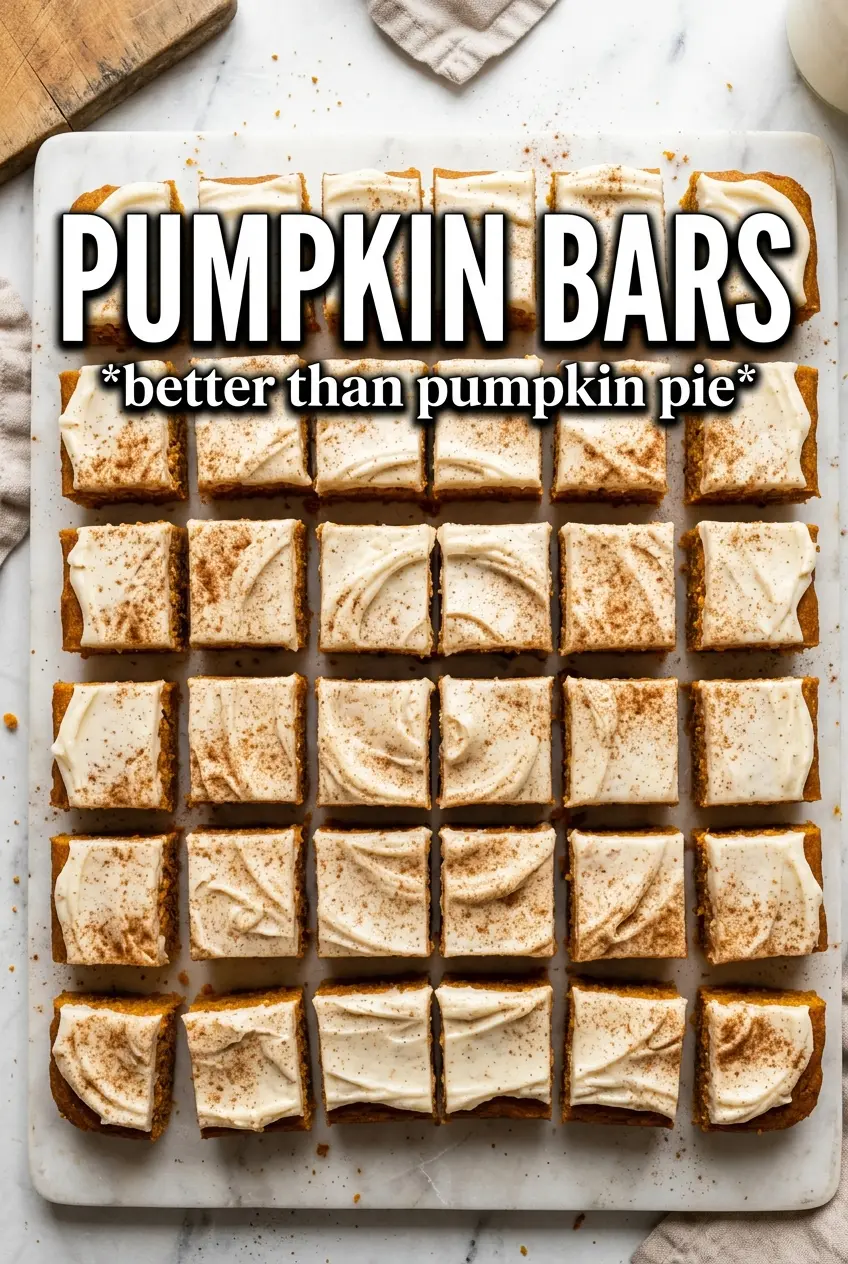
The bars baked up perfectly even in my jelly roll pan, and after chilling the frosting, they cut into clean squares with that soft, moist crumb everyone kept going back for.
Love these pumpkin bars with thick cream cheese frosting? Save them to Pinterest for the next time you want a soft, spiced dessert that slices neatly and feeds a crowd.
The Trick to Pumpkin Bars That Stay Soft Instead of Dry
Most pumpkin bars go wrong in one of two places: the batter gets overmixed, or the pan bakes too long because the center still looks a touch soft. Pumpkin puree and oil already bring plenty of moisture, so the flour only needs a brief stir to disappear. Once the dry ingredients are streak-free, stop. That small restraint is what keeps the crumb tender instead of tight and bready.
The other thing that matters here is the pan. A jelly roll pan or rimmed baking sheet gives the batter enough surface area to bake quickly and evenly. If you use a smaller pan, the center can stay gummy while the edges dry out. The bars are done when a toothpick comes out clean and the edges are just starting to pull away from the pan, not when the top looks deeply browned.
What Each Ingredient Is Actually Doing in These Bars
- Pumpkin puree — This is what gives the bars their moisture and that dense, plush crumb. Use plain pumpkin puree, not pumpkin pie filling, which already contains sugar and spices and throws the balance off.
- Vegetable oil — Oil keeps these bars soft even after chilling. Butter adds flavor, but it firms up in the fridge; oil stays tender, which is exactly what you want in a frosted bar.
- Pumpkin pie spice and cinnamon — The spice blend gives you warmth in the background, while the extra cinnamon sharpens the flavor so the bars don’t taste flat. If you only have pumpkin pie spice, you can use it in place of some of the cinnamon, but don’t skip the dedicated cinnamon if you want that bakery-style finish.
- Cream cheese — Full-fat cream cheese gives the frosting its tang and structure. Low-fat cream cheese can work, but it tends to soften more and won’t pipe or spread as neatly.
- Powdered sugar — This sweetens and thickens the frosting at the same time. Add it in stages if you want a smoother finish and less cloud of sugar in the bowl.
How to Mix, Bake, and Frost Pumpkin Bars Without Losing the Tender Crumb
Building the Batter
Whisk the flour, leaveners, spices, and salt first so the baking powder and soda are spread evenly through the batter. In a separate bowl, beat the eggs, sugar, oil, pumpkin, and vanilla until the mixture looks smooth and glossy. That step helps the sugar dissolve a little and gives you a more even bake. Fold in the dry ingredients just until the flour disappears; a few small streaks are better than beating the batter into toughness.
Baking to the Right Point
Spread the batter into a greased 15×10 pan and smooth it into the corners so it bakes at the same rate across the whole sheet. Bake at 350°F until a toothpick comes out clean and the edges start to pull away from the sides. If the center still jiggles like batter, it needs more time; if you wait for deep browning, the bars will go dry before the middle finishes. Pull the pan out and let the residual heat do the last bit of work.
Cooling Before the Frosting
Let the bars cool completely before the frosting goes on. Warm pumpkin cake will melt cream cheese frosting into a thin layer, and then you lose the thick, swirled top that makes these bars look finished. If you’re in a hurry, set the pan on a rack and give it time; room-temperature bars are the easiest to frost cleanly.
Making the Frosting Smooth
Beat the cream cheese and butter until completely smooth before adding powdered sugar. If either one still has cold bits in the middle, you’ll end up with little lumps that won’t disappear later. Once the sugar is mixed in, the frosting should look fluffy and spreadable, not loose. Chill the frosted bars for about 30 minutes before cutting so the frosting firms up enough for clean slices.
How to Adapt These Pumpkin Bars for Different Kitchens and Different Cravings
Dairy-Free Version
Use a dairy-free cream cheese and plant-based butter for the frosting. The bars themselves are already dairy-free, so this swap keeps the whole dessert accessible without changing the texture of the cake layer. The frosting may soften a little faster, so keep the finished bars chilled until serving.
Less Sweet, More Spice
If you like a less sugary dessert, cut the powdered sugar in the frosting by about half a cup and add a pinch more cinnamon. The frosting will be a little softer and tangier, which works well if you want the pumpkin flavor to stand out more than the sweetness.
Gluten-Free Bars
A good 1:1 gluten-free flour blend can work here as long as it contains xanthan gum or a similar binder. The bars may be a touch more delicate when warm, so let them cool completely before cutting. That resting time gives the crumb a chance to settle into clean squares.
Storage and Reheating
- Refrigerator: Store in an airtight container for up to 5 days. The frosting stays best when the bars are chilled, and the crumb holds its moisture well.
- Freezer: Freeze unfrosted bars for up to 2 months, wrapped tightly and stored flat. Frosting can become a little soft after thawing, so I prefer to freeze the cake layer and frost it after it thaws.
- Reheating: These are best served chilled or at cool room temperature, not heated. If they’ve been in the fridge, let them sit out for 20 to 30 minutes so the frosting softens just enough for the best texture.
Answers to the Questions Worth Asking
Pumpkin Bars
Ingredients
Equipment
Method
- Preheat oven to 350F and grease a 15x10 jelly roll pan or rimmed baking sheet, ensuring the surface is well coated to prevent sticking.
- In a bowl, whisk all-purpose flour, baking powder, baking soda, pumpkin pie spice, cinnamon, and salt until evenly combined and speckled uniformly.
- In a second bowl, beat eggs, granulated sugar, vegetable oil, pumpkin puree, and vanilla extract until smooth, thick, and glossy.
- Fold the flour mixture into the pumpkin mixture until just combined, stopping when no dry streaks remain to keep the bars tender.
- Pour the batter into the prepared pan and spread it into an even layer so it bakes uniformly.
- Bake for 25-30 minutes at 350F until a toothpick comes out clean and the edges pull away from the sides.
- Cool completely in the pan before frosting so the surface doesn’t melt the cream cheese.
- Beat cream cheese frosting ingredients—cream cheese and unsalted butter—until smooth and fluffy, then mix in powdered sugar, vanilla, and cinnamon.
- Spread the frosting over the cooled bars, using an offset spatula to cover the surface evenly.
- Dust the top lightly with cinnamon for a finished look.
- Refrigerate for 30 minutes before cutting into bars so the frosting firms up for neat rectangles.