
Bright green Halloween deviled eggs bring the kind of playful table drama that gets people reaching for a plate before they’ve finished saying hello. The filling stays smooth and tangy, the whites stay tender, and the little olive spiders give each egg enough personality that they feel festive without being fussy. They’re the sort of party appetizer that disappears fast because they’re familiar, but just strange enough to get a smile.
The trick is in the yolk filling. A little Dijon and white vinegar keep the flavor sharp enough to balance the mayonnaise, and the food coloring goes in at the end so you can stop once the shade looks bold instead of pastel. The eggs themselves need a proper chill after boiling; that ice bath isn’t optional if you want clean-peeling whites and neat halves instead of ragged edges.
Below you’ll find the part that matters most: how to keep the filling creamy, how to avoid overcooking the eggs, and how to make the olive spiders look deliberate instead of clumsy. Once you’ve done it once, this becomes an easy little holiday habit.
The filling was smooth and piped cleanly, and the olive spiders held their shape after chilling. I brought these to a Halloween party and the platter was empty in ten minutes.
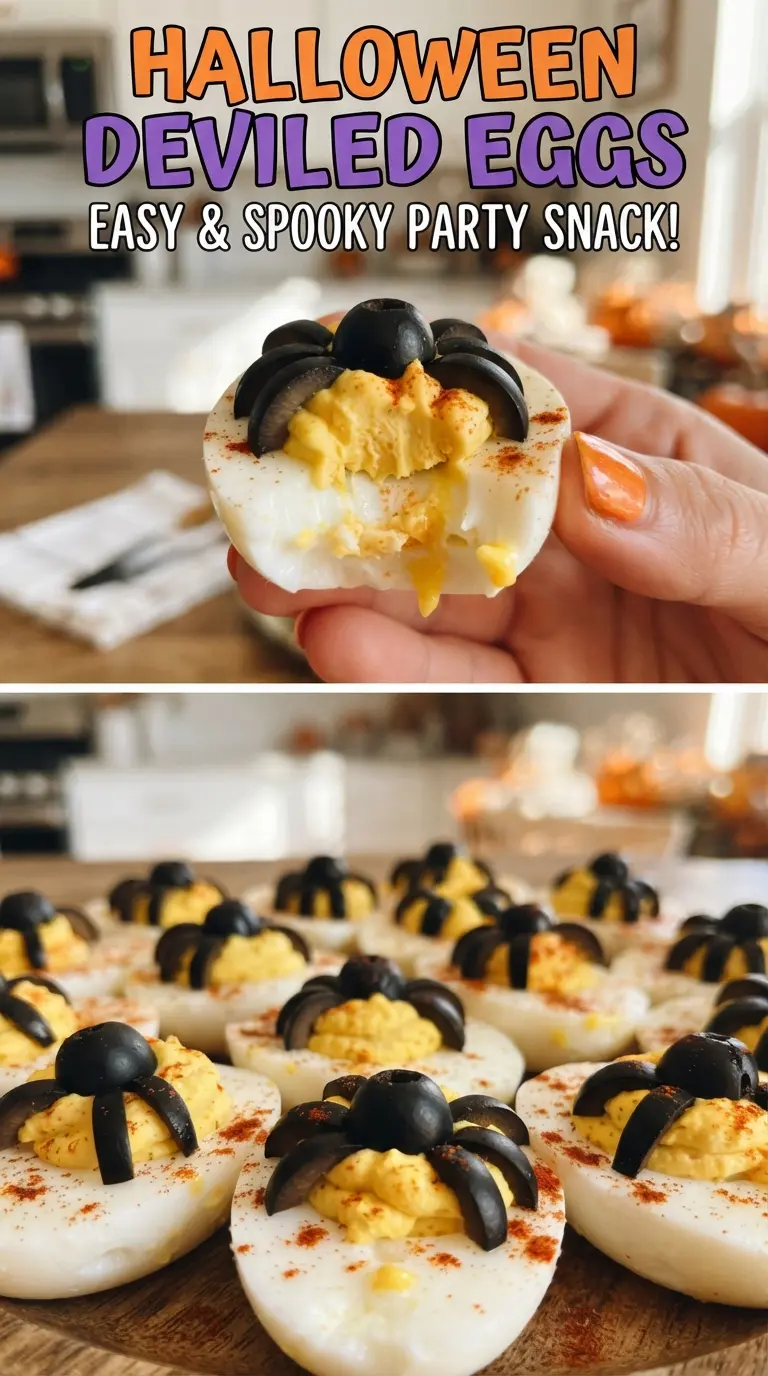
These Halloween deviled eggs get their spooky look from that bright green filling and the olive spider topping, so the whole tray stands out fast.
The Boiling Step That Keeps Deviled Eggs Easy to Peel
Most deviled egg trouble starts before the filling ever gets mixed. If the eggs cook too hard, the yolks turn dry and the whites get rubbery around the edges. If they cool slowly, the shells cling to the albumen and tear the eggs apart when you peel them. The covered-off-heat method gives you firm whites and centered yolks without that chalky ring that makes the filling taste heavy.
The ice bath matters just as much as the boil. It stops the carryover cooking right away and contracts the egg white slightly so the shells release more cleanly. If one egg cracks in the pot, keep going; that happens from time to time, and it won’t ruin the batch as long as the water stays at a steady boil before you cover it.
What the Yolks, Mustard, and Food Coloring Each Do Here
- Egg yolks — These give you the body of the filling. Fresh eggs are fine here, but eggs that are a few days old usually peel more cleanly, which matters more than anything else in the final look.
- Mayonnaise — This is what makes the filling creamy enough to pipe. Use a mayo you already like eating plain, because its flavor comes through. If you need a lighter version, you can replace part of it with plain Greek yogurt, but the filling will taste tangier and feel a little less plush.
- Dijon mustard and white vinegar — They keep the yolks from tasting flat. Dijon adds depth while vinegar sharpens everything and keeps the filling from tasting heavy. Yellow mustard works in a pinch, but it brings a brighter, less rounded flavor.
- Green gel food coloring — Gel coloring gives you a strong spooky color without thinning the filling. Liquid coloring works, but you’ll need more of it, and too much can loosen the texture. Add it drop by drop until the color looks bold enough against the white eggs.
- Black olives — These carry the spider look, so choose pitted olives with a firm texture. Very soft olives can smear when you slice the legs, while firmer ones hold their shape and look cleaner on the platter.
Building the Filling and the Spiders Without Making a Mess
Mashing the yolks to a pipeable base
Scoop the yolks into a bowl and mash them until they’re fine and crumbly before you add the mayonnaise. That first dry mash keeps you from chasing out lumps later, which is how fillings end up grainy. Stir in the mayo, Dijon, vinegar, and salt until the mixture looks smooth and thick, then stop and check the texture. It should hold its shape on a spoon but still slide cleanly through a piping bag or zip-top corner.
Coloring it without thinning it out
Add the green gel food coloring after the filling is already smooth. If you put the color in too early, it’s harder to judge the final shade and you often use more than you need. Stir in one drop at a time until the filling looks vivid and slightly eerie; it will look a touch darker once it sits. If the filling starts to loosen, it usually means too much coloring or too much vinegar went in at once.
Assembling the spider topping
Halve each olive, then place one half dome-side up on the center of each egg for the body. Slice the remaining olive halves into thin strips for the legs and arrange four on each side so the spiders look balanced. Don’t press the olives into the filling too hard or they’ll sink and lose the shape you just built. Chill the eggs before serving so the topping sets and the filling firms up enough to hold its lines.
Make them a little milder
Use 3/4 teaspoon Dijon instead of a full teaspoon and skip the vinegar if you want a softer, more kid-friendly filling. The eggs will taste less sharp and a little richer, which works well if you’re serving them alongside other strong party foods.
Dairy-free by default
This recipe already fits dairy-free eating as written, since the creaminess comes from mayonnaise instead of cream cheese or sour cream. Just check your mayo label if you’re cooking for someone with an allergy, because some brands use ingredients that vary by region.
Swap the olive spiders for a simpler finish
If you don’t want to build spiders, top the eggs with a tiny olive ring or a few chive pieces instead. You’ll lose the full spooky effect, but the eggs are easier to transport and still look festive on a party tray.
Storage and Reheating
- Refrigerator: Store covered for up to 2 days. The filling stays smooth, but the olive spiders can dry slightly if they sit too long uncovered.
- Freezer: Don’t freeze assembled deviled eggs. The whites turn watery and rubbery after thawing, and the filling separates.
- Reheating: These are served cold, so reheating isn’t needed. If you’ve chilled them hard, let them sit at room temperature for 10 to 15 minutes before serving so the filling tastes creamy instead of muted.
Answers to the Questions Worth Asking

Halloween Deviled Eggs
Ingredients
Equipment
Method
- Place the eggs in a pot and cover with cold water, then bring to a boil. Cover the pot, remove from heat, and let the eggs stand for 12 minutes.
- Chill the eggs in an ice bath for 10 minutes. Peel them, then halve each egg lengthwise.
- Mash the yolks with mayonnaise, Dijon mustard, white vinegar, and salt until smooth. Stir in the green gel food coloring until the mixture is bright green.
- Pipe the filling into the egg whites. Refrigerate the filled eggs until you assemble the spiders.
- Halve each black olive lengthwise, then place one half dome-side up on each egg for the spider body. Arrange the eggs on a sheet pan.
- Slice the remaining olive halves into thin strips and arrange 8 legs around each body. Chill until serving.


