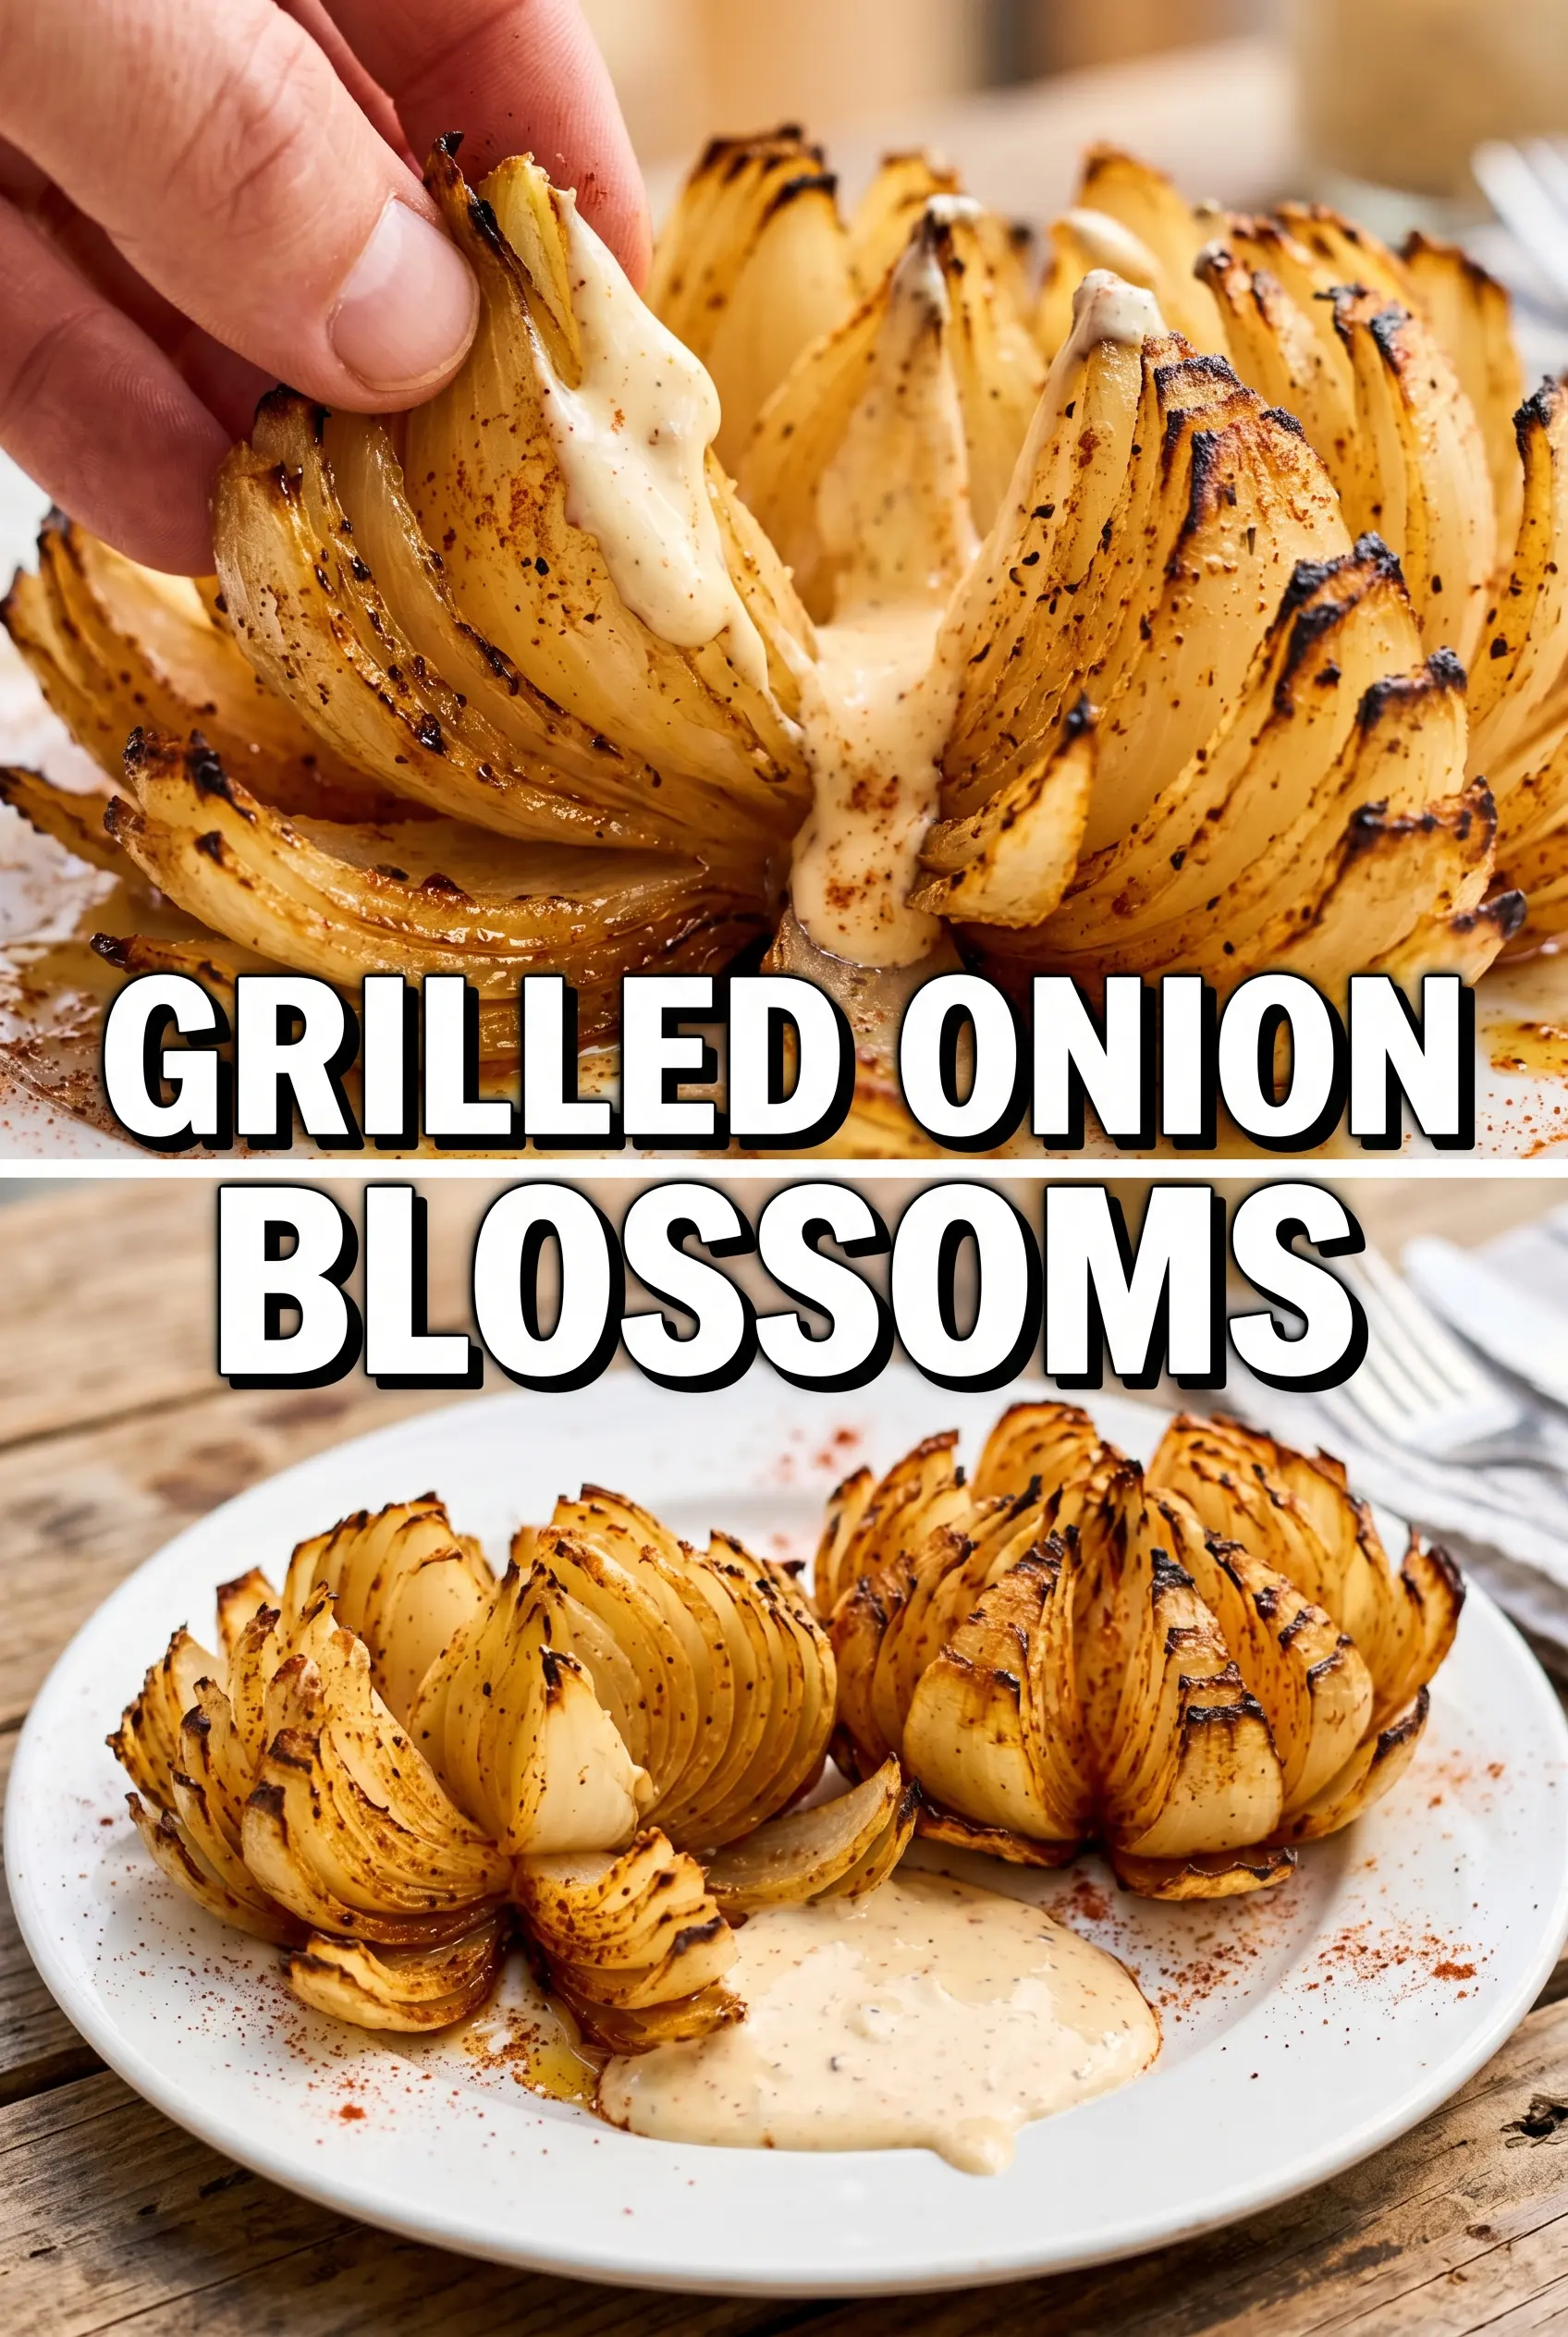
Grilled onion blossoms come off the grates tender at the core, lightly charred on the edges, and just dramatic enough to make an ordinary cookout feel special. The onion opens into a flower as it cooks, with the outer wedges taking on smoke and spice while the center turns sweet and silky. It’s the kind of appetizer people keep picking at between bites of everything else on the table.
What makes this version work is the foil wrap. It traps heat long enough to soften the onion all the way through without drying out the outer layers before the middle is done. The spice mix is built to cling to the olive oil, so the paprika and garlic stay on the onion instead of falling into the grates. Sweet onions matter here, because they mellow as they grill and give you that natural caramelized finish without needing sugar.
Below, I’ve included the small details that make the blossom open cleanly, plus a few ways to adjust the heat level or make this work if you want to swap the dip.
The onions turned out tender all the way through, and the edges got those little charred spots without falling apart. I served them with ranch and they disappeared before the burgers were even off the grill.
Like this grilled onion blossom? Save it for the next cookout when you want a smoky appetizer with crisp-tender petals and an easy dipping sauce.
The Reason Sweet Onions Stay Tender on the Grill Instead of Drying Out
A grilled onion blossom lives or dies by heat control. If you put the onion straight over aggressive flames, the outer wedges scorch before the center has time to soften, and you end up with burnt edges and a raw core. Wrapping the onions in foil changes the cook completely. It turns the grill into a steamy, enclosed oven for the first stretch, then the last few minutes of unwrapped heat give you the caramelized edges and light char.
The other mistake is cutting too far through the root. That root end is what holds the blossom together, so leave a solid base intact when you make the vertical cuts. Once it’s separated gently by hand, the onion opens on its own as it cooks. You’re not trying to force petals apart before grilling; you’re giving them room to relax and fan open with heat.
What the Seasoning Is Doing While the Onion Grills

- Sweet onions — These are the right choice because they soften fast and turn mellow instead of sharp. Yellow onions can work in a pinch, but they’ll taste more pungent and hold onto more bite after grilling.
- Olive oil — This helps the seasoning cling and keeps the onion from drying out. Brush it on generously so the spice blend spreads evenly into the cuts instead of sitting only on the surface.
- Paprika, garlic powder, and onion powder — This trio gives the onion a deeper savory edge without needing a wet marinade. Smoked paprika works well if you want more grill flavor, but the regular version keeps the seasoning balanced and clean.
- Cayenne — This is where the heat comes from, and it stays flexible. Use the full amount for a real kick, or cut it back if you’re serving the blossoms with a spicy dip like comeback sauce.
- Ranch or comeback sauce — The onion is sweet, smoky, and a little spicy, so the dip should bring coolness or tang. Ranch smooths out the heat, while comeback sauce adds a sharper, more Southern-style finish.
Getting the Blossoms to Open, Char, and Finish at the Same Time
Trimming and Cutting the Onion
Cut a thin slice off the top, then peel away the papery skin without disturbing the root. Make 8 to 12 vertical cuts from the top down, stopping just before the root so the onion stays attached. If you slice through the base, the blossom falls apart on the grill and you lose the shape that makes the dish special. After cutting, gently spread the wedges with your fingers; don’t pry them open hard, or the layers break before they cook.
Seasoning the Layers
Brush the onion with olive oil first, then work the spice blend across the top and down into the cuts. The oil acts like glue, and the seasoning needs to get between the wedges, not just on the outside. Salt draws moisture during cooking, which helps the onion soften, but too much at the start can make the surface wet and prevent browning, so season with a light hand and adjust at the table if needed.
Grilling in Foil
Wrap each onion tightly in foil and place it over medium heat for about 25 to 30 minutes. You’re listening for a steady sizzle and looking for an onion that feels tender when the packet is nudged with tongs. If the grill runs hot, move the packets to a cooler zone; otherwise the outer layers can dry out before the middle becomes silky.
The Final Char and Serve
Unwrap the onions carefully because steam will rush out. Once opened, return them to the grill for a short finishing burst if you want a little more char on the edges, then garnish with parsley and serve right away with dipping sauce. The petals should be soft enough to pull apart with a fork but still hold their shape. If the onion tastes flat, it usually needs a final pinch of salt more than it needs more sauce.
How to Adapt Grilled Onion Blossoms for Different Grills and Heat Levels
Milder for Kids or Heat-Sensitive Guests
Leave out the cayenne and use a little extra paprika instead. You’ll still get color and a smoky-sweet edge, but the blossom will read more like a savory grilled onion than a spicy appetizer.
Dairy-Free Dip Swap
Use a dairy-free ranch or a simple mayo-based comeback sauce made with vegan mayonnaise. The onions themselves are already dairy-free, so this swap keeps the whole appetizer friendly for guests who skip milk products without changing the grill method.
Smoke-Lover’s Version
Swap standard paprika for smoked paprika and finish the onions over a hotter part of the grill for the last few minutes. That gives you a deeper barbecue edge, but the risk is faster browning, so keep an eye on the outer wedges once the foil comes off.
Storage and Reheating
- Refrigerator: Store leftovers in an airtight container for up to 3 days. The onion will soften a little more as it sits, but the flavor stays good.
- Freezer: I don’t recommend freezing these. The texture turns mushy after thawing, and the blossom shape doesn’t hold up well.
- Reheating: Rewarm on a covered grill pan or in a 350°F oven until heated through. The biggest mistake is microwaving too long, which makes the onion watery and dulls the charred edges.
Questions I Get Asked About This Recipe
Grilled Onion Blossoms
Ingredients
Method
- Cut off the top of each onion and peel away the papery skin, leaving the root intact. Keep the onion steady so the root holds the layers together.
- Make vertical cuts from the top down, stopping before the root, creating 8-12 wedges that remain attached. Aim for even spacing so the blossom opens neatly.
- Gently separate the wedges to create a blossom shape. Let the layers fan out while keeping the root attached.
- Brush the onions with olive oil and sprinkle with paprika, garlic powder, onion powder, cayenne, salt, and pepper. Make sure seasoning reaches between the separated layers.
- Wrap each onion in foil and grill over medium heat for 25-30 minutes until tender and caramelized. Look for softened outer layers and browned edges as a visual cue.
- Unwrap the onions carefully and let them rest briefly until the foil is cool enough to handle. Keep the blossom open so the seasoning stays visible.
- Garnish with parsley and serve immediately with dipping sauce. Pair the charred, opened onion layers with the sauce for contrast.