Charred broccoli can be the side dish that disappears first when it’s done right: crisp at the edges, tender in the stems, and carrying just enough smoke to make the lemon and garlic pop. The trick is getting real grill marks without turning the florets limp or bitter. That balance makes this version worth putting on repeat.
Blanching the broccoli first gives you a head start, so the grill is working on color and flavor instead of trying to cook raw broccoli through in a few minutes. After that, the olive oil protects the florets, while the lemon zest and garlic cling to the surface and finish the dish with brightness instead of heaviness. A short grill time over medium-high heat is all it takes once the broccoli is prepped properly.
Below, I’ll walk you through the one step that keeps the broccoli from drying out, plus a few smart variations if you want to change the finish or skip the cheese.
I’ve grilled broccoli before, but blanching it first made such a difference. The florets stayed tender inside, got those crispy edges, and the lemon-garlic finish tasted fresh instead of burnt.
Save this grilled broccoli with crispy charred edges and lemon-garlic seasoning for the night you want a fast side that still feels special.
The Trick to Keeping Grilled Broccoli Crisp Instead of Soggy
Broccoli has enough moisture to steam itself if you rush it onto the grill straight from the cutting board. That’s why the blanching step matters here. It softens the stems just enough so the outside can char quickly without leaving you with raw broccoli in the middle or limp florets from overcooking.
The other thing that goes wrong fast is crowding. When the pieces sit too tightly together, they trap steam and lose the smoky edges you’re after. Give the florets some breathing room, and don’t chase a dark crust too early; you want a little char, not blackened tips that taste harsh.
- Blanched broccoli — This is what makes the texture work. Raw broccoli can take longer than the grill time allows, but a brief boil gives you a tender center and a faster path to caramelized edges.
- Olive oil — It helps the seasoning stick and protects the surface from drying out. A lighter oil works too, but olive oil adds a roundness that fits the lemon and garlic.
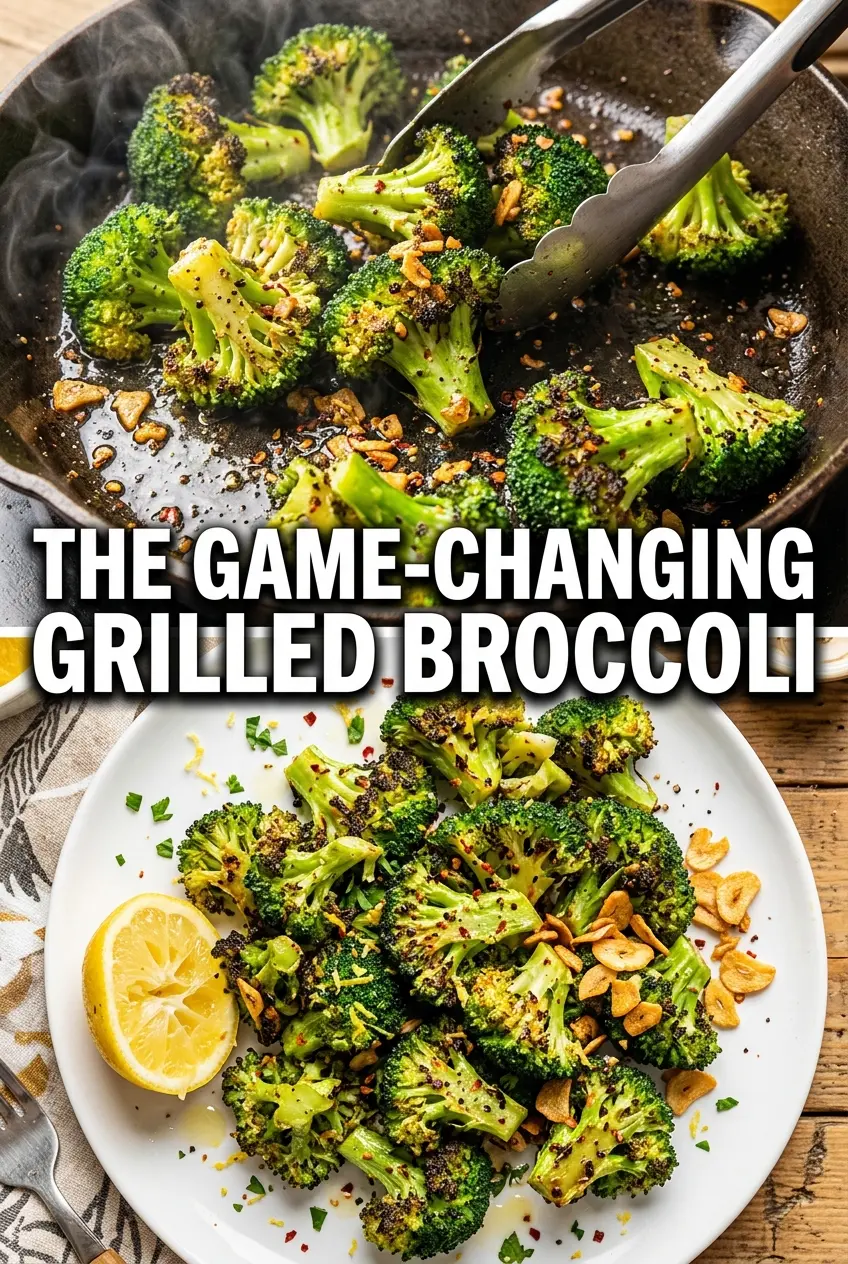
- Lemon zest and juice — Zest gives you the bright aroma without watering everything down. Juice adds acidity, but use it after blanching and before grilling so the broccoli still gets good browning.
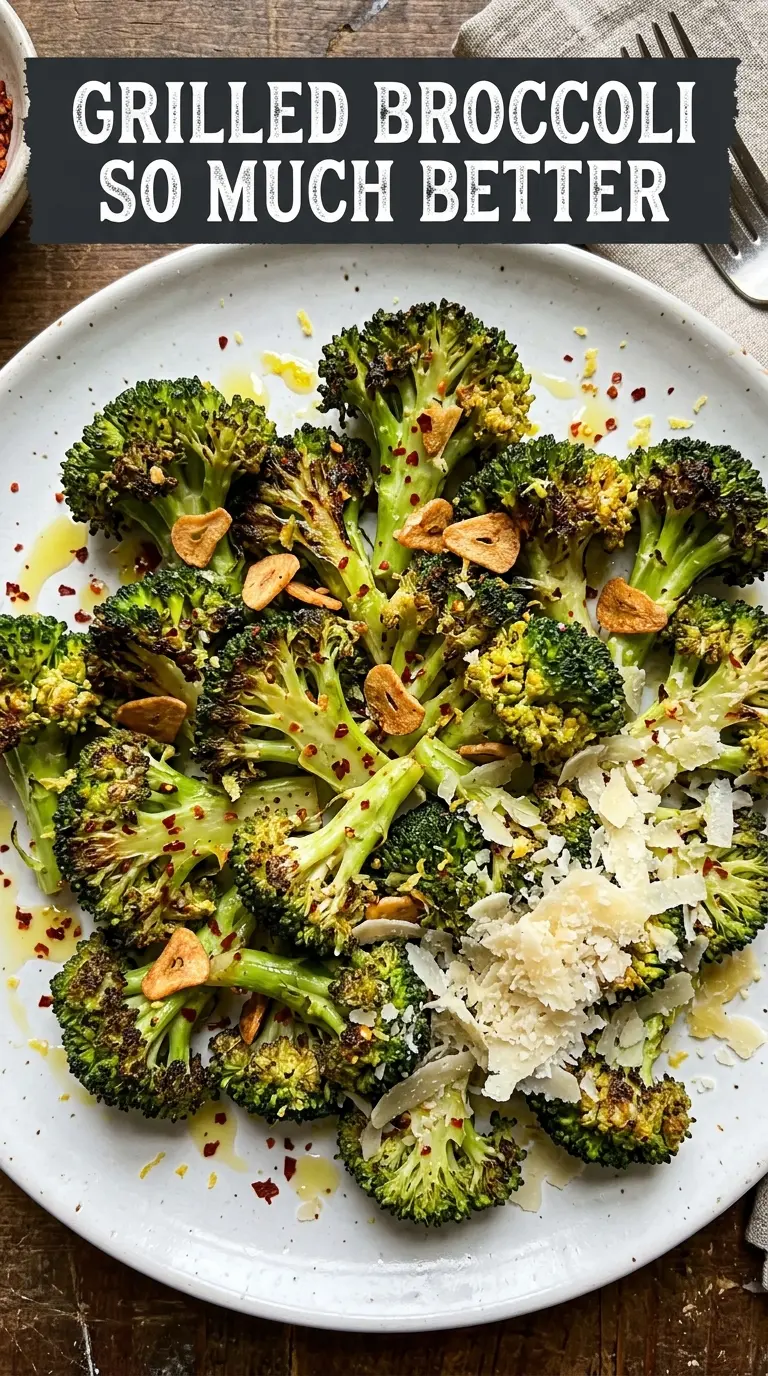
- Parmesan — Best added at the end, when the broccoli is hot enough to soften the cheese slightly. Pre-grilling cheese tends to burn before the vegetables finish.
What Each Ingredient Is Actually Doing in This Dish
The garlic does better here than in many grilled vegetable recipes because it’s mixed with oil and lemon before it hits the grill. If you pile raw garlic on top at the end, it can taste sharp and uneven. Mince it fine so it coats the florets instead of falling off into the grates.
Red pepper flakes are optional, but they’re useful if you want the broccoli to cut through a heavier main dish. You don’t need much. A small pinch is enough to add warmth without turning the side into a spicy recipe.
- Broccoli florets — Cut them large enough to stay on the grill and not slip through the grates. Smaller pieces char too fast and can overcook before you get the right texture.
- Garlic — Fresh garlic brings the best flavor here, but it burns easily. The oil coating helps, and the blanching step keeps the grill time short enough that it won’t turn bitter.
- Lemon zest — This carries the bright citrus note better than juice alone. If you skip it, the dish still works, but it loses that fresh top note that makes the broccoli taste lifted.
- Parmesan — Use the best you have if you want a salty, nutty finish. A finely grated version melts into the hot broccoli faster than a thick shred.
How to Grill the Broccoli So the Edges Char First
Blanching for a Head Start
Drop the florets into boiling water for 2 minutes, then drain them well. They should still hold their shape, but the stems will darken slightly and look just a little tender. If you skip the draining step, the extra water will fight the oil and leave you with pale broccoli that steams instead of browns.
Coating the Florets Evenly
Toss the broccoli with olive oil, garlic, lemon zest, lemon juice, salt, and pepper until every piece looks lightly glossy. The goal is a thin coat, not a heavy marinade pooling in the bowl. If the garlic clumps, break it up with your fingers or a spoon so it doesn’t burn in one spot.
Building Char on the Grill
Lay the broccoli on a medium-high grill and leave it alone long enough for the first side to take on dark marks. Four to five minutes per side is the right range, but watch the color and the feel, not the clock alone. When the edges look crisp and the stems yield to a fork without collapsing, it’s done.
Finishing at the Table
Move the broccoli to a platter right away and finish with red pepper flakes and Parmesan if you’re using it. The heat from the vegetables softens the cheese just enough to cling to the florets. If you wait too long, the broccoli loses the fresh-off-the-grill edge that makes it stand out.
Three Ways to Adapt Grilled Broccoli Without Losing the Point
Dairy-Free Finish
Skip the Parmesan and finish with a little extra lemon zest and a pinch of flaky salt. You’ll lose the salty, nutty edge from the cheese, but the broccoli stays bright and clean, which works well when you want the grilled flavor to stay front and center.
No Grill, Same Charred Taste
Use a hot grill pan or a cast-iron skillet on the stovetop and work in batches. You won’t get the same smoky note from an outdoor grill, but you’ll still get the crisp edges and browned spots that make this recipe work.
More Heat, Less Brightness
Add a heavier pinch of red pepper flakes or a little black pepper before grilling. That gives the broccoli a warmer finish, but it pulls some attention away from the lemon, so it works best beside grilled meats or richer mains.
Storage and Reheating
- Refrigerator: Store leftovers in an airtight container for up to 3 days. The florets soften a bit, but the flavor stays good.
- Freezer: I don’t recommend freezing this one. The broccoli turns soft and loses the crisp edges that make it worth making.
- Reheating: Reheat in a hot skillet, air fryer, or 400°F oven until warmed through. The biggest mistake is microwaving it too long, which wipes out the char and leaves the broccoli watery.
Questions I Get Asked About This Recipe
Grilled Broccoli
Ingredients
Method
- Bring a pot of water to a rolling boil and blanch the broccoli florets for 2 minutes for tender-crisp texture. Drain well so the florets are dry enough to char on the grill.
- Toss the drained broccoli with olive oil, minced garlic, lemon zest, lemon juice, salt, and black pepper until evenly coated for lemon-garlic flavor.
- Heat a grill to medium-high heat and grill the broccoli for 4-5 minutes per side until charred and tender, turning as needed for even browning. Look for deep grill marks and slightly crisp edges before removing.
- Transfer the charred broccoli to a serving platter and sprinkle with red pepper flakes and Parmesan cheese if desired. Serve immediately while the florets are hot and the edges stay crisp.