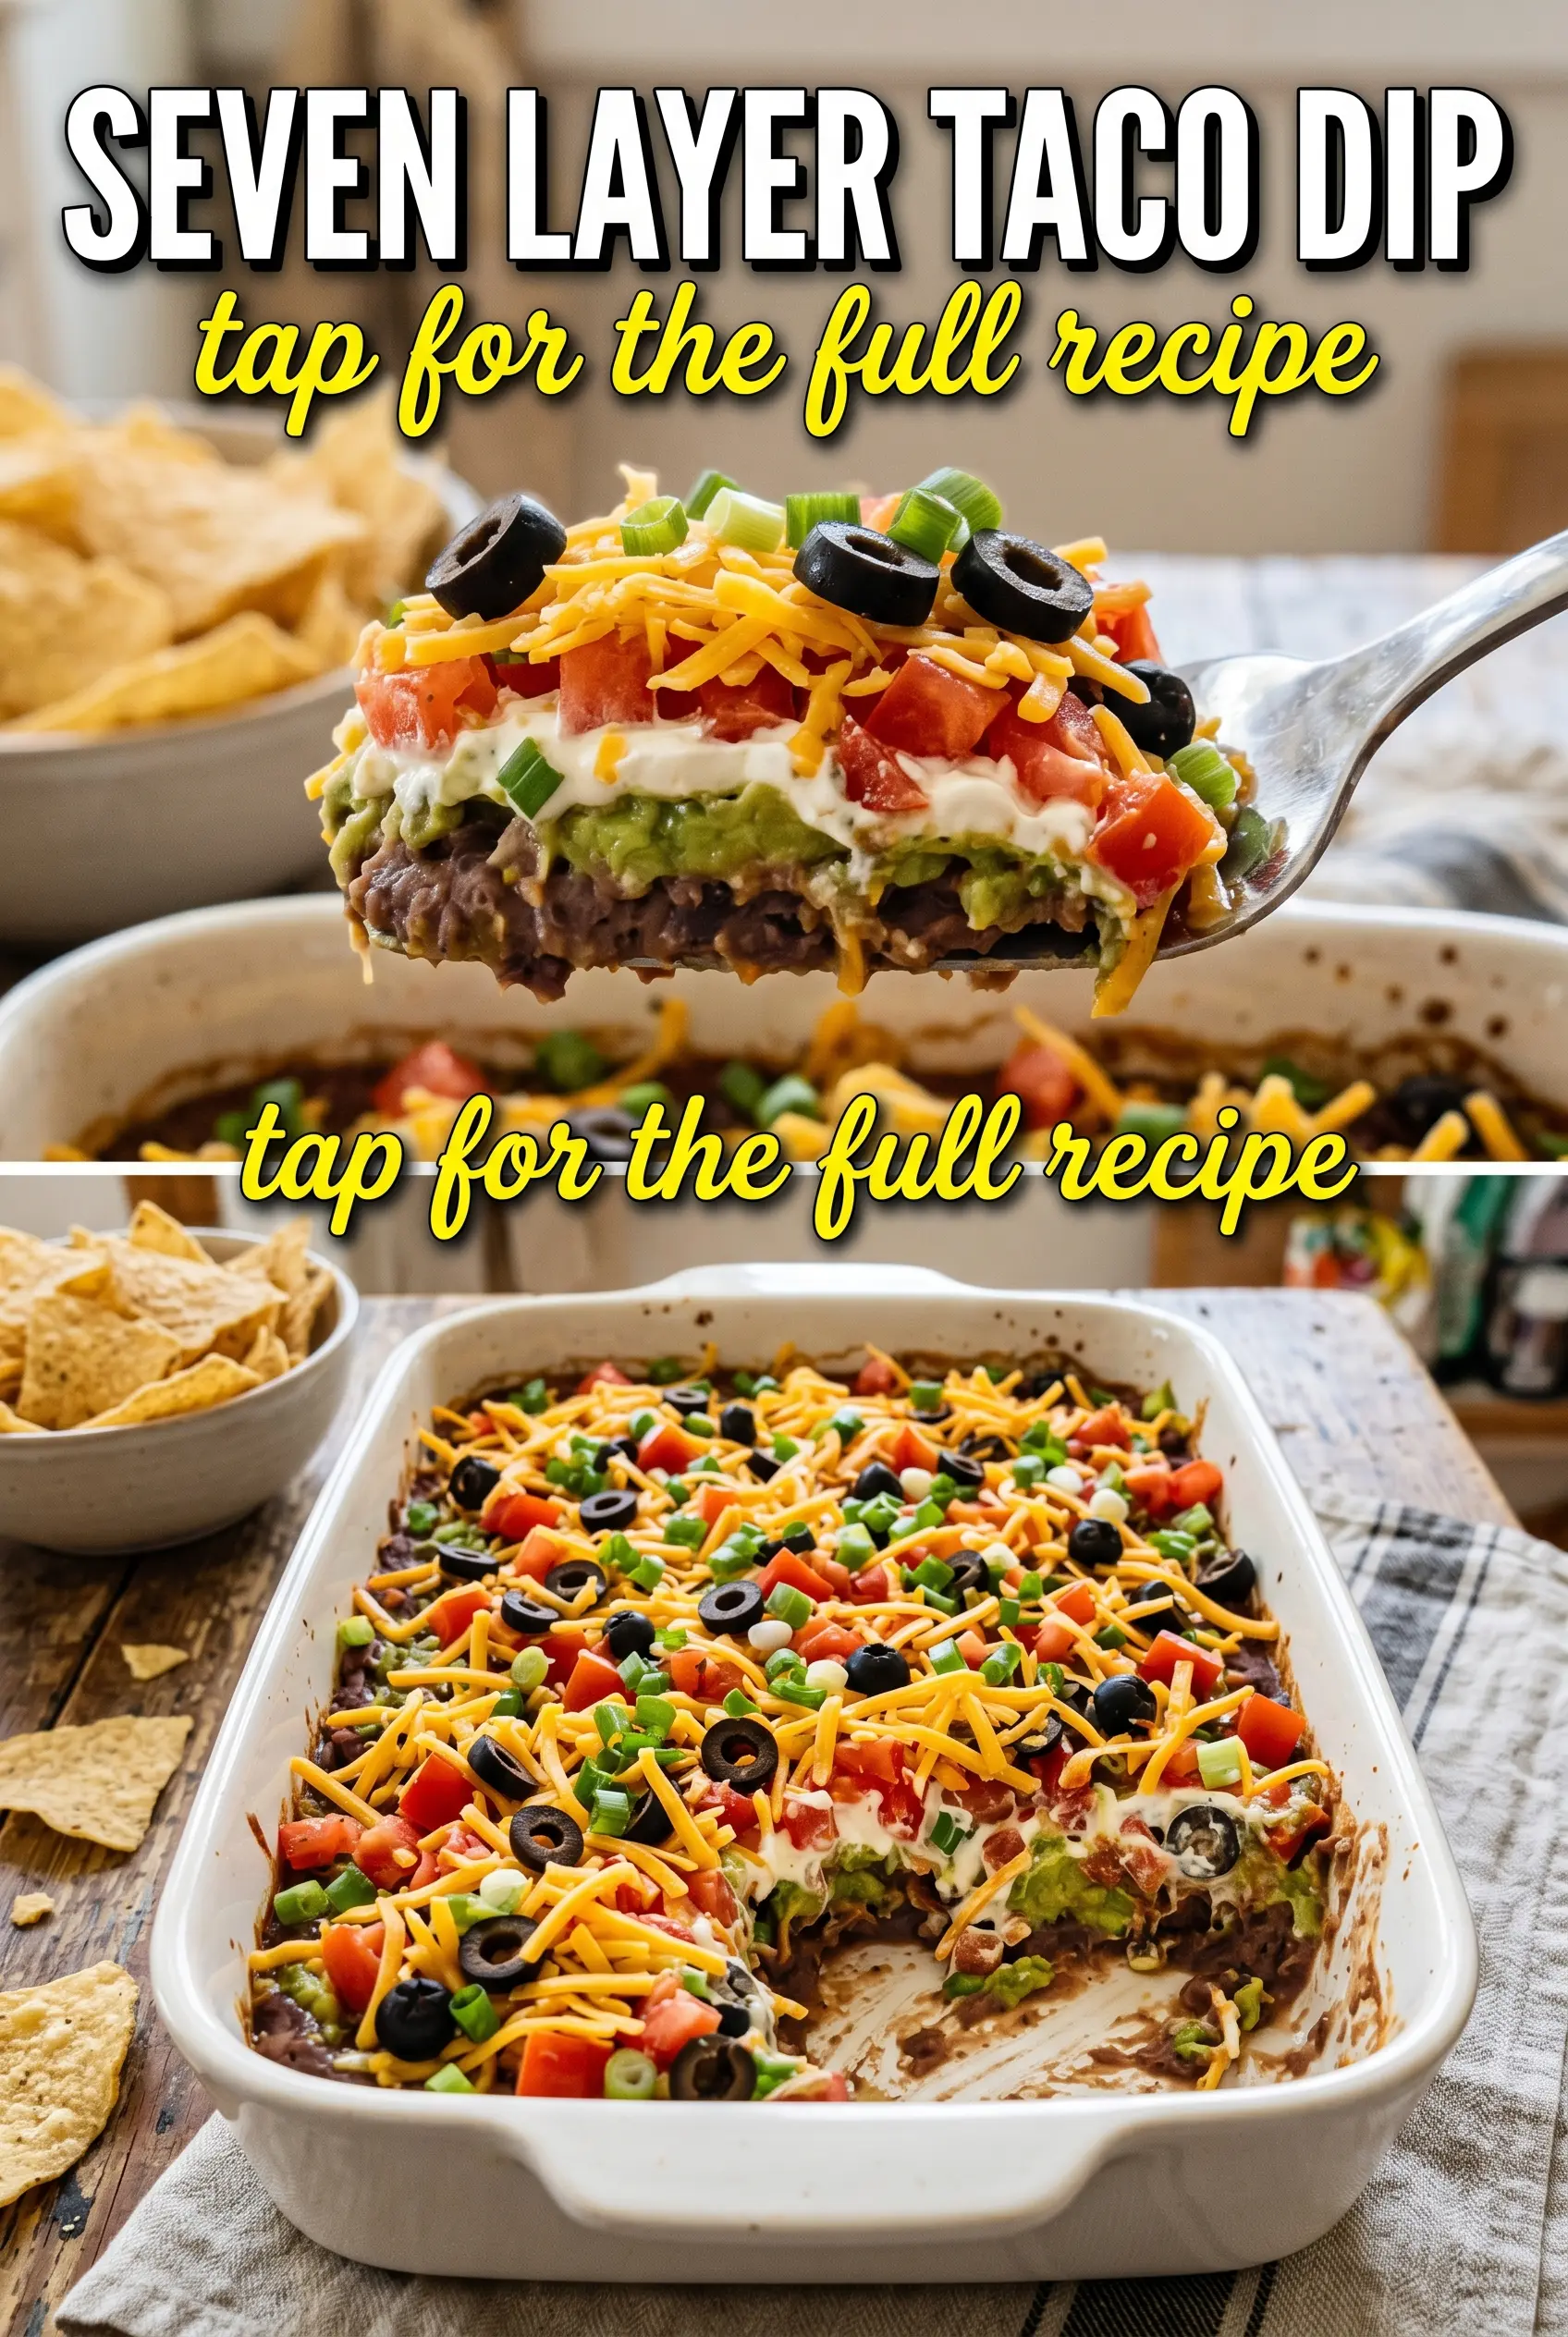
Seven Layer Taco Dip is the kind of appetizer that disappears before the main meal even has a chance. The layers stay distinct, the dip tastes cool and creamy against the seasoned beans, and every scoop gets a little bit of everything: salty cheese, juicy tomato, briny olives, and that fresh hit of cilantro at the end. It’s the sort of dish people hover over, then come back to for “just one more” chip.
What makes this version work is the balance between structure and freshness. The beans anchor the dip so it doesn’t slide into a puddle, while the sour cream and taco seasoning create a tangy middle layer that keeps the whole thing from tasting flat. The trick is layering in the right order and keeping the wetter toppings toward the top, where they belong, so the bottom stays scoopable instead of soggy.
Below, you’ll find the small details that keep each layer clean and the dip party-ready, plus a few swaps for when you need to adjust for what’s in the fridge.
The sour cream layer held its shape and the beans didn’t get watery underneath, even after sitting out for the whole game. I added the cilantro right at the end and it kept the top tasting fresh.
Make this seven layer taco dip when you want a clean, colorful appetizer that scoops up with sturdy chips and stays layered until the last bite.
The Reason the Bottom Layer Stays Scoopable Instead of Turning Soft
The biggest mistake with layered dip is treating every layer like it can handle the same amount of moisture. It can’t. Refried beans go on the bottom because they act like a seal, and the sour cream mixture needs enough seasoning to taste bold without becoming watery. If the sour cream layer gets loose, it’s usually because the taco seasoning wasn’t mixed in fully before spreading, or because the tomatoes went on too early and started bleeding downward.
The other thing that matters is thickness. Thin layers look neat at first, but they disappear under chips and turn messy fast. Spread each layer edge to edge, then stop. Piling everything into the center might look tall, but it makes the first scoop collapse and pushes moisture straight to the bottom.
What Each Layer Is Actually Doing Here
- Refried beans — This is the foundation and the only layer that can really hold the rest of the dip together. Canned beans are fine here; if you’re using homemade, cook them a little thicker than you normally would so they don’t slump.
- Sour cream — This gives the middle layer that cool, tangy contrast against the beans and cheese. Full-fat sour cream spreads more cleanly than low-fat, which can loosen up once it sits, but either works if you keep the layer even.
- Taco seasoning — This is where the dip gets its taco-shop flavor without needing extra steps. A packet is convenient, but if you’re watching sodium, use about 2 tablespoons of homemade seasoning and taste before spreading.
- Cheddar cheese — Shredding your own cheddar gives a cleaner melt-free layer and a better texture than pre-shredded, which can taste a little dusty. Since this cheese stays raw on top, sharp cheddar gives the most payoff.
- Tomatoes, olives, green onions, and cilantro — These are the bright, fresh finish, and they’re best kept as dry as possible. Drain the tomatoes and olives well, then add the cilantro right before serving so the top still looks fresh and green.
Layering It So Every Chip Gets the Right Bite
Start With a Firm Base
Spread the refried beans into an even layer in a 9×13-inch dish, pressing gently so there aren’t any gaps. If the beans are stiff from the can, stir them first; if they’re too thick to spread, warm them for a few seconds so they loosen just enough. The goal is a smooth base that won’t drag up when you add the next layer. If you see cracks, keep smoothing rather than adding more beans, which only makes the bottom heavy.
Build the Cream Layer Slowly
Mix the sour cream with the taco seasoning until the color is even and there are no streaks left. Spread it carefully over the beans with the back of a spoon or offset spatula, starting in the center and working outward so you don’t pull up the bean layer. If the sour cream is too thin, it’ll swirl into the beans instead of sitting on top, and that usually means it was overmixed or too warm. A chilled bowl helps keep it firm while you assemble everything.
Finish With the Fresh Toppings
Sprinkle on the cheddar first so it acts like a cushion for the tomatoes. Then add the tomatoes, olives, green onions, and cilantro in that order, draining the tomatoes well so the top doesn’t turn slick. If you’re making the dip ahead, hold the cilantro until the last minute; it wilts fastest and is the first thing to lose its brightness. Serve with sturdy tortilla chips that can handle a layered scoop without snapping halfway through.
How to Make This Dip Fit the Pantry You Have
Dairy-Free Version
Use a dairy-free sour cream and a plant-based shredded cheese that melts cleanly, then keep the rest of the layers the same. The dip will still taste familiar, but the cheese layer may be a little softer and less salty, so taste the sour cream mixture before spreading.
Lower-Sodium Taco Dip
Use reduced-sodium refried beans and make your own taco seasoning so you can control the salt. The flavor stays bold, but it won’t have that packet-seasoning edge that can dominate the dip if you’re serving a crowd with different tastes.
Add More Heat
Stir chopped pickled jalapeños into the bean layer or scatter them over the top with the olives. That keeps the heat bright instead of burying it in the creamy layer, and it gives each chip a sharper, more taco-stand kind of bite.
Make It Ahead for a Party
Assemble the beans, sour cream mixture, cheese, tomatoes, and olives up to a day ahead, then cover and chill. Hold the green onions and cilantro until just before serving so the top stays crisp and the herbs don’t darken.
Storage and Reheating
- Refrigerator: Cover and chill for up to 3 days. The tomatoes will soften and the top will lose some of its shine, but the flavor still holds up well.
- Freezer: Don’t freeze this dip. The sour cream and fresh vegetables separate when thawed, and the texture turns grainy and wet.
- Reheating: This dip is served cold, so don’t reheat it. If it’s been chilled, let it sit out for 10 to 15 minutes before serving so the beans loosen slightly and the flavors open up.
Questions I Get Asked About This Recipe
Seven Layer Taco Dip
Ingredients
Method
- Spread the refried beans evenly in the bottom of a 9x13 inch baking dish as the first layer, aiming for an even surface with clear coverage.
- Mix the sour cream and taco seasoning until combined, then spread the mixture over the beans as the second layer so the beans are fully covered.
- Sprinkle the shredded cheddar cheese over the sour cream layer in an even blanket, making sure it reaches the edges.
- Add a layer of diced tomatoes over the cheese for a bright red layer with visible pieces.
- Top with the drained sliced black olives, distributing them evenly across the tomatoes.
- Finish with green onions and fresh cilantro just before serving so the top looks fresh and vibrant.
- Serve immediately with tortilla chips on the side for scooping through the distinct layers.