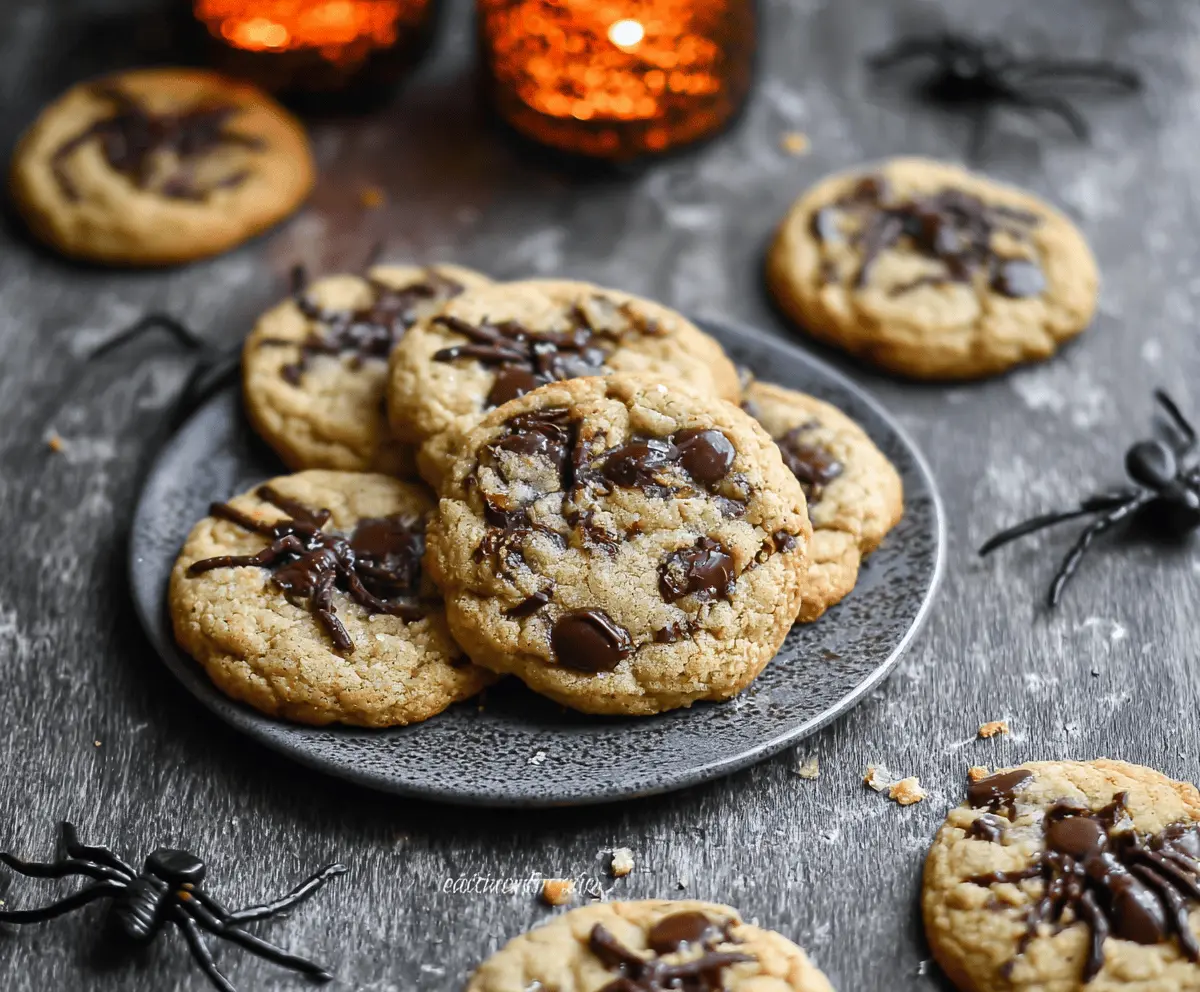
These Halloween chocolate chip cookies are a fun treat that everyone will love! They are chewy, chocolaty, and perfect for spooky celebrations.
Who says cookies are just for Christmas? I like to add some orange sprinkles to make them festive. Bake a batch and watch them vanish faster than a ghost! 👻
Key Ingredients & Substitutions
All-purpose flour: This is your base for the cookies. You can swap it out for a gluten-free alternative like almond flour or a store-bought gluten-free blend if you have dietary restrictions.
Butter: Unsalted butter adds richness to the cookies. You can use margarine or coconut oil as a dairy-free substitute, but note that the texture may change slightly.
Granulated and brown sugar: Together, they help to create a soft and chewy texture. Coconut sugar can work as a healthier alternative, though it may alter the flavor a bit.
Chocolate chips: Semisweet chips bring sweetness. For a fun twist, try using white chocolate chips or even Halloween-themed candies like Reese’s Pieces or candy corn for a festive touch!
Dark chocolate for decorating: You can use milk chocolate or even caramel for different flavors. However, melted candy melts also work if you want vibrant colors.
How Do I Get Chewy Cookies with a Perfect Texture?
The key to chewy cookies is in the mixing. Here’s how to get that perfect texture:
- Use room temperature butter for easier creaming with sugars, which helps with fluffiness.
- Don’t overmix when you add the flour. Just mix until you see no dry streaks.
- Chilling the dough for 30 minutes brings out even better flavor and prevents spreading.
- Underbake them slightly so the centers remain soft; they’ll continue to cook on the baking sheet after you take them out of the oven.
Follow these tips, and you’ll have cookies that everyone will want to grab from the spooky platter!
Halloween Chocolate Chip Cookies
Ingredients You’ll Need:
- 2 1/4 cups all-purpose flour
- 1 teaspoon baking soda
- 1/2 teaspoon salt
- 1 cup (2 sticks) unsalted butter, softened
- 3/4 cup granulated sugar
- 3/4 cup packed brown sugar (light or dark)
- 1 teaspoon vanilla extract
- 2 large eggs
- 2 cups semisweet chocolate chips
- Additional chocolate chips for decorating spiders
- 1/2 cup dark chocolate or chocolate melting wafer, melted (for decorating)
How Much Time Will You Need?
This recipe will take about 20 minutes of preparation time and about 10 minutes of baking time. You’ll also want to let the cookies cool for a few minutes on the baking sheet and then fully cool on a rack before decorating. Total time: around 40-45 minutes.
Step-by-Step Instructions:
1. Preheat and Prepare:
Start by preheating your oven to 375°F (190°C). While it’s warming up, line your baking sheets with parchment paper or silicone baking mats to prevent sticking.
2. Mix Your Dry Ingredients:
In a medium-sized bowl, whisk together the all-purpose flour, baking soda, and salt. This helps to evenly distribute the ingredients. Once done, set the bowl aside.
3. Cream the Butter and Sugars:
In a large bowl, use an electric mixer to cream the softened butter, granulated sugar, and brown sugar together. Beat them until the mixture is light and fluffy, which usually takes about 2-3 minutes.
4. Add Vanilla and Eggs:
Next, add the vanilla extract and the eggs, one at a time. Make sure to mix well after each addition until everything is combined smoothly.
5. Combine Dry and Wet Ingredients:
Gradually incorporate the dry ingredients into the wet ingredients, mixing just until everything is combined. Avoid overmixing to keep your cookies soft!
6. Stir in Chocolate Chips:
Fold in the 2 cups of semisweet chocolate chips using a spatula or a wooden spoon until they are evenly distributed throughout the dough.
7. Shape the Cookies:
Drop rounded tablespoons of dough onto the prepared baking sheets, making sure to space them about 2 inches apart, as they will spread while baking.
8. Bake the Cookies:
Put the cookies in the oven and bake for 9 to 11 minutes, or until the edges are just lightly golden. The centers might look a bit soft; that’s okay as they’ll firm up while cooling.
9. Cool Down:
Once baked, remove the cookies from the oven and let them sit on the baking sheet for about 5 minutes. Then transfer them to a wire rack to cool completely.
10. Decorate with Chocolate:
After the cookies are cooled, melt the dark chocolate or chocolate melts in a microwave-safe bowl in short bursts, stirring until it’s nice and smooth. It’s time to get creative!
11. Create Spider Decorations:
Using the melted chocolate, draw spider legs around a nearby chocolate chip (the spider’s body) on each cookie. You can add more chocolate chips or drops for extra decoration.
12. Let It Set:
Allow the chocolate decorations to set completely before serving your spooky cookies to family and friends. Enjoy your Halloween festivities!
These cookies are not just delicious—they’re also a fun, festive treat for any Halloween gathering. Happy baking!
Can I Use Different Types of Chocolate Chips?
Absolutely! While semisweet chocolate chips are classic, you can substitute them with milk chocolate, dark chocolate, or even white chocolate chips for a different flavor. If you’re feeling adventurous, try using Halloween-themed candies to add a festive touch!
How Can I Make These Cookies Gluten-Free?
You can use a gluten-free all-purpose flour blend instead of regular all-purpose flour. Make sure the blend includes xanthan gum, or add a small amount yourself to help with texture.
What If I Don’t Have Dark Chocolate or Chocolate Melting Wafers for Decorating?
No worries! You can use regular chocolate chips or melts instead. Simply melt them down in a microwave-safe bowl until smooth, and use them for decorating the cookies!
Can I Store Leftover Cookies?
Yes! Store any leftover cookies in an airtight container at room temperature for up to 5 days. If you want to keep them longer, you can freeze them in a single layer and transfer them to a freezer bag for up to 3 months. Just thaw them at room temperature when you’re ready to enjoy again!