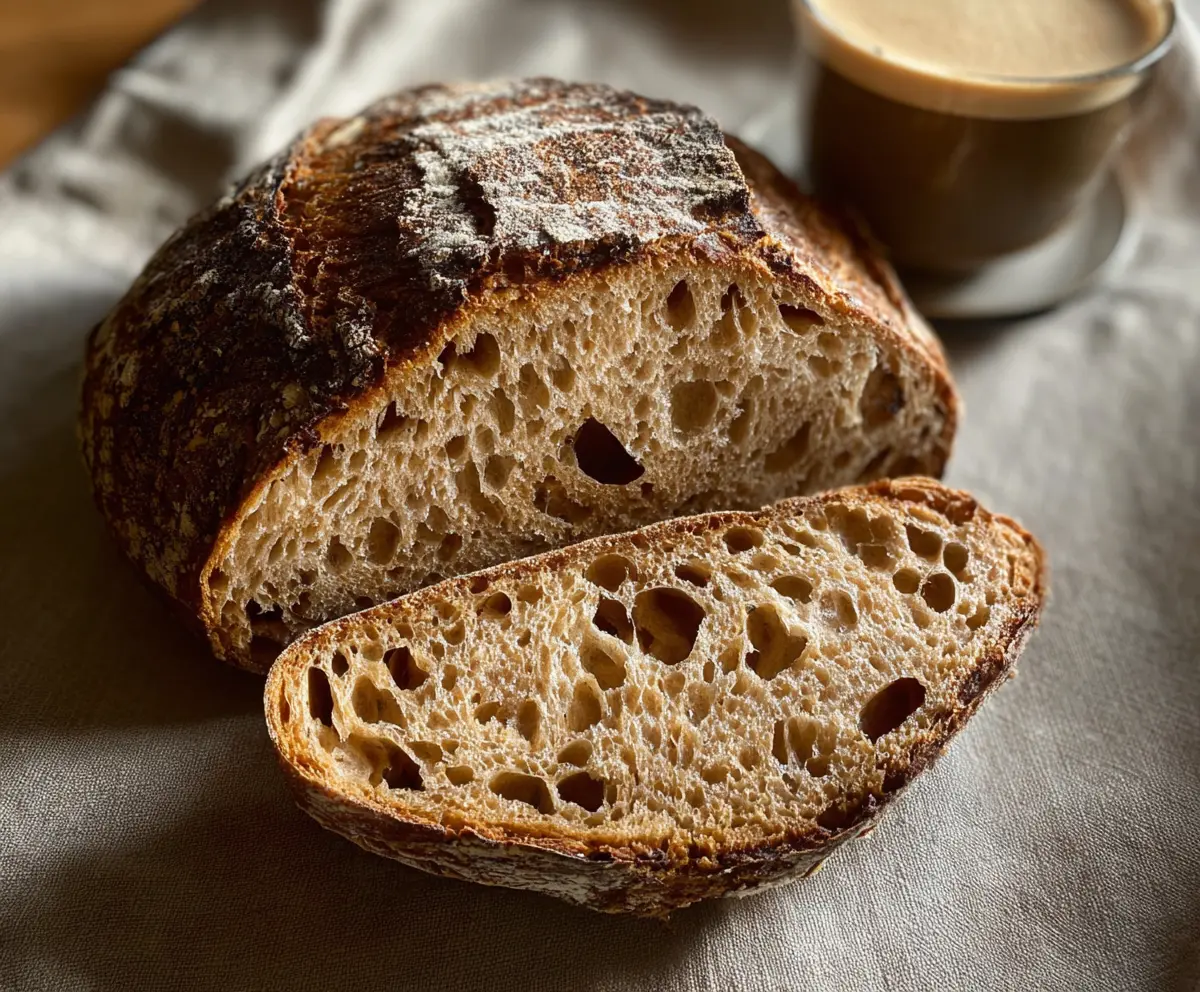
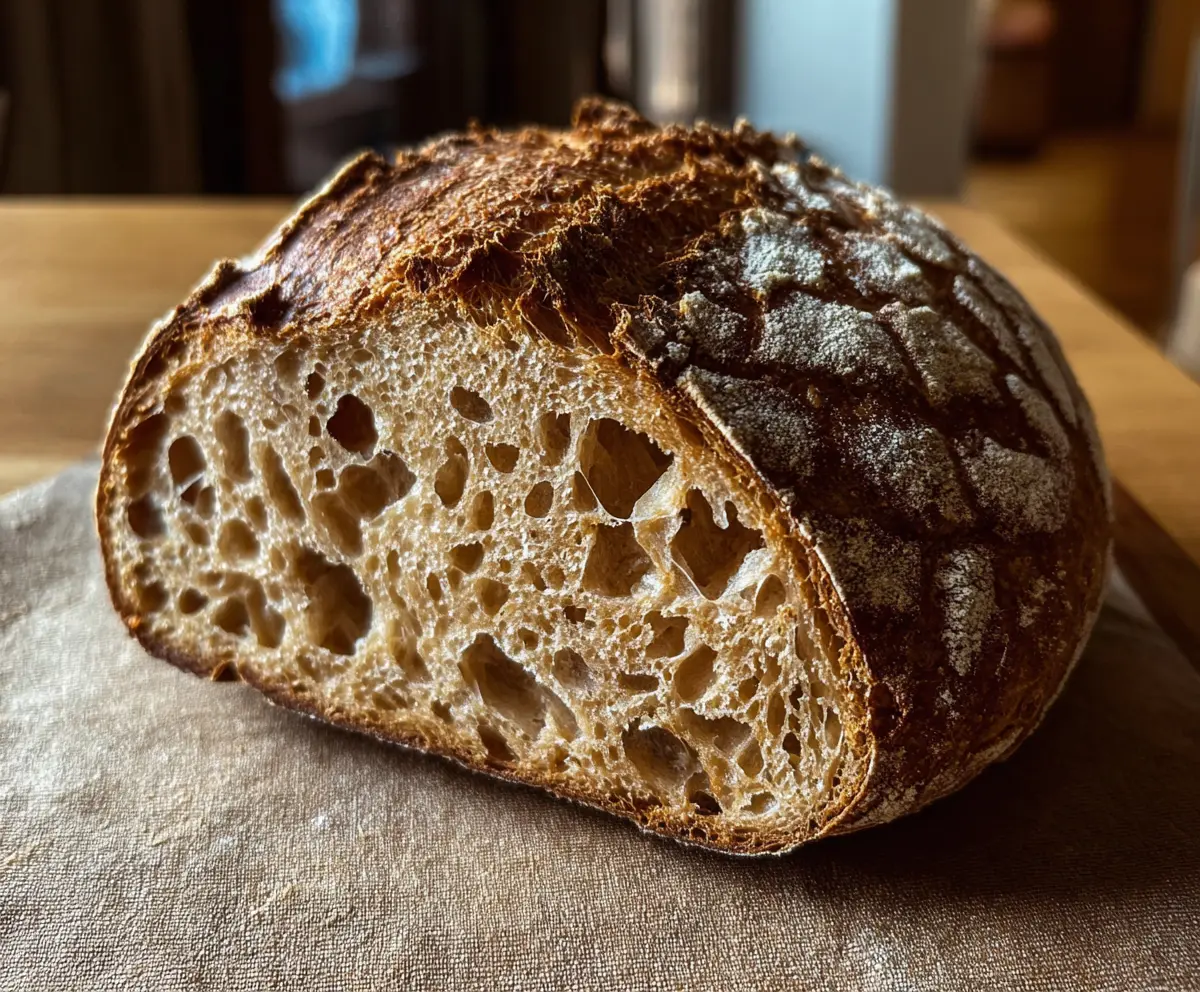
This Crusty Sourdough Bread is a winner! With its golden-brown crust and soft, chewy inside, it’s perfect for toasting or enjoying with butter. Just the right blend of tangy and fresh!
Who doesn’t love that satisfying crunch when you slice into it? I love dunking a piece in my coffee for a tasty breakfast. It’s the little joys that make mornings better! ☕️🥖
Key Ingredients & Substitutions
Bread Flour: High-protein bread flour is best for structure. If you don’t have it, you can substitute with all-purpose flour, but the texture may be less chewy. For a gluten-free option, try a gluten-free bread flour mix.
Sourdough Starter: An active starter is essential. If you don’t have one, you can make a quick version using a mix of flour and water, but it won’t develop the same deep flavor. Using a friend’s starter can also be a fun way to acquire one!
Salt: Sea salt or kosher salt works well here. If you’re watching your sodium intake, you can cut the salt in half. However, keep in mind that salt does help control fermentation and enhances flavor.
Coffee: The optional coffee adds a unique depth. For a caffeine-free version, you could use decaf or substitute with brewed chicory root tea for a similar bitterness without the caffeine kick.
How Can I Ensure My Dough Gets a Good Rise?
The key to a good rise lies in your bulk fermentation and shaping techniques. Make sure your dough has enough time to ferment and develop flavor. Here’s how:
- During the bulk fermentation, perform 4 stretch and folds every 30 minutes for the first 2 hours. This develops gluten, which supports the dough’s structure.
- After the folds, let your dough rise undisturbed until it’s 50%-75% larger. Look for bubbles forming on the surface.
- When shaping, handle the dough gently to retain gas bubbles. Create surface tension by tucking the edges in.
This method ensures your bread will rise well, giving you that lovely airy crumb with a crispy crust!
How to Make Crusty Sourdough Bread with Coffee
Ingredients You’ll Need:
For the Bread:
- 500g bread flour (preferably unbleached, high protein)
- 350g water (room temperature)
- 100g active sourdough starter (fed and bubbly)
- 10g salt
Optional for Coffee Flavor Infusion:
- 1/4 cup cooled brewed strong coffee (to replace some of the water)
How Much Time Will You Need?
This delicious sourdough bread requires about 30 minutes of prep time, with an additional 4 to 6 hours for fermentation and minimal active time. If you choose the overnight cold proof, it enhances the flavor and can be done the night before. Total time may vary depending on how long you let it ferment!
Step-by-Step Instructions:
1. Prepare the Starter and Dough:
Start by combining the active sourdough starter with water (or a coffee-water mix if you’re adding that coffee flavor) in a large mixing bowl. Stir it together until well mixed. Gradually add the bread flour and mix everything until there’s no dry flour left. The dough will look shaggy at this point. Cover the bowl with a damp towel or plastic wrap, and let it rest for about 30 minutes—this is known as the autolyse phase and helps develop gluten.
2. Add Salt:
Once your 30 minutes are up, sprinkle the salt over the dough. Then, mix well by folding the dough over itself several times until the salt is fully incorporated. You might notice the dough becoming smoother!
3. Bulk Fermentation:
Let the dough ferment at a comfortable room temperature (around 21-24°C or 70-75°F). For the first 2 hours, every 30 minutes, perform a set of stretch and folds—lift one edge of the dough and fold it over to the center. Do this four times, rotating the bowl each time. After this, cover the dough and let it rise for 2 to 3 more hours until it’s visibly larger, about 50%-75% bigger.
4. Shape the Dough:
Lightly flour a clean work surface. Gently turn the dough out onto the flour and shape it into a tight round boule by folding the edges towards the center and flipping it over, using your hands to create tension on the top. Then place the shaped dough seam-side up in a well-floured proofing basket (banneton) or a bowl lined with a floured kitchen towel.
5. Final Proof:
Cover the dough with a towel or some plastic wrap. Let it proof for about 1-2 hours at room temperature until it looks puffy and nearly doubled in size. Alternatively, you can refrigerate it overnight for a slower, cold proof, which will enhance the flavor greatly.
6. Preheat the Oven and Dutch Oven:
About 30 minutes before you are ready to bake, place a Dutch oven (or a heavy, oven-safe pot with a lid) in your oven and preheat it to 240°C (460°F). This ensures your bread gets that crispy crust!
7. Bake:
Once the oven is preheated and the Dutch oven is hot, carefully remove it from the oven. Gently invert your dough onto a piece of parchment paper. Use a sharp knife or lame to score the top—this helps your bread expand correctly while baking. Transfer the dough (with the parchment) into the Dutch oven, cover it with the lid, and bake for 20 minutes. After 20 minutes, remove the lid and bake for an additional 20-25 minutes until the crust is a deep, golden brown and crisp.
8. Cool:
Remove the bread from the Dutch oven and place it on a wire rack to cool completely before slicing. This allows the crumb structure to set, giving you that perfect texture.
Serving Suggestion:
Enjoy your crusty sourdough bread with a freshly brewed cup of coffee for a wonderful breakfast or snack pairing. The flavors complement each other beautifully!
Can I Use All-Purpose Flour Instead of Bread Flour?
Yes, you can use all-purpose flour, but the texture may be less chewy and the rise may not be as good. For best results, stick to high-protein bread flour if possible!
What If My Sourdough Starter Isn’t Active?
If your starter isn’t bubbling and fed, it won’t give your bread the rise and flavor you want. Make sure to feed your starter at least 4-6 hours before using it, or even better, feed it the night before to ensure it’s active and bubbly!
Can I Refrigerate the Dough After Shaping?
Absolutely! Refrigerating the dough overnight after shaping it enhances the flavor and allows for a slower fermentation process, which can lead to a more complex taste.
How Should I Store Leftover Bread?
Let the bread cool completely, then store it in a paper bag or wrapped in a kitchen towel to maintain its crust for a couple of days. For longer storage, slice it and freeze in an airtight container. Reheat gently in the oven for best results!