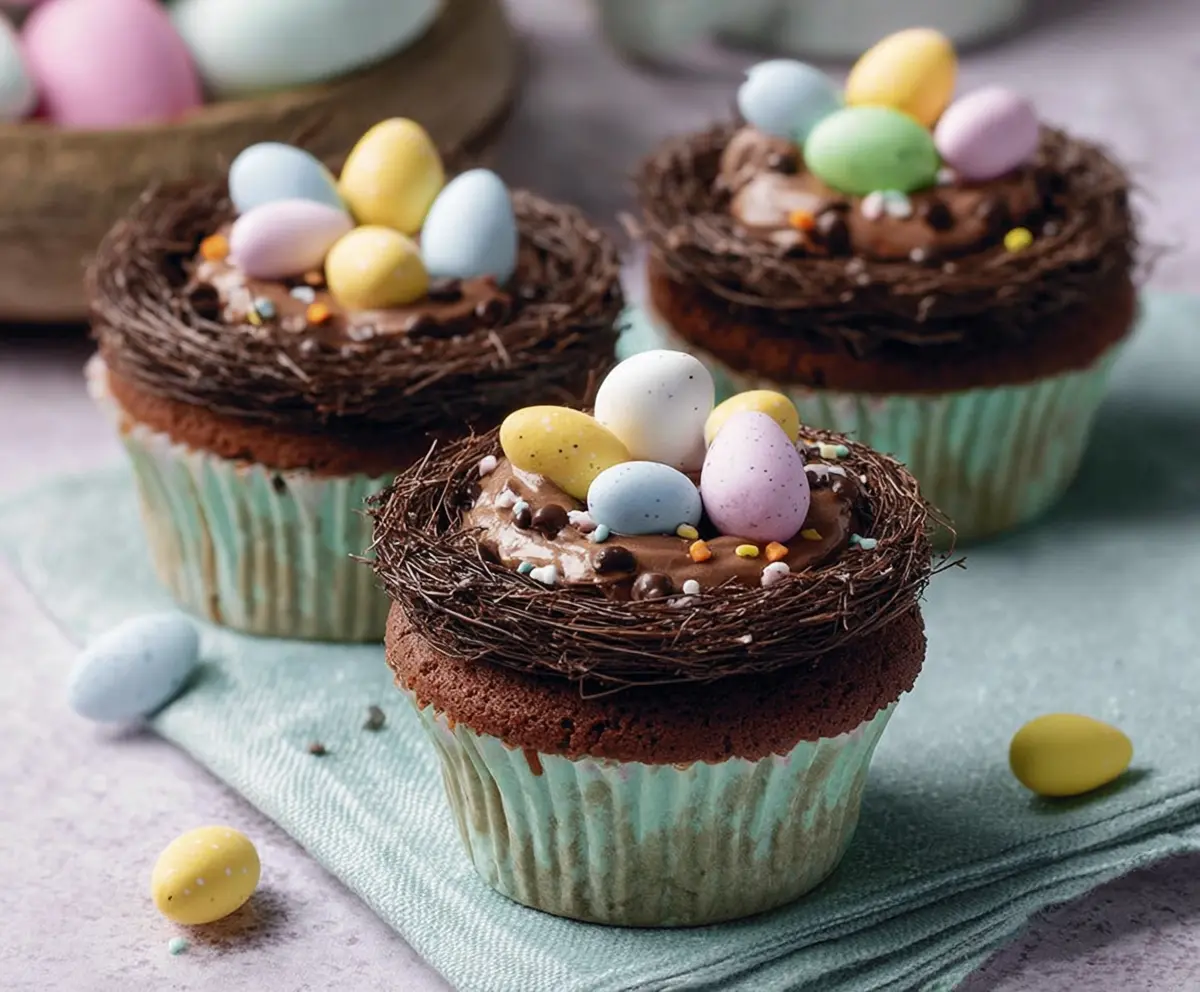
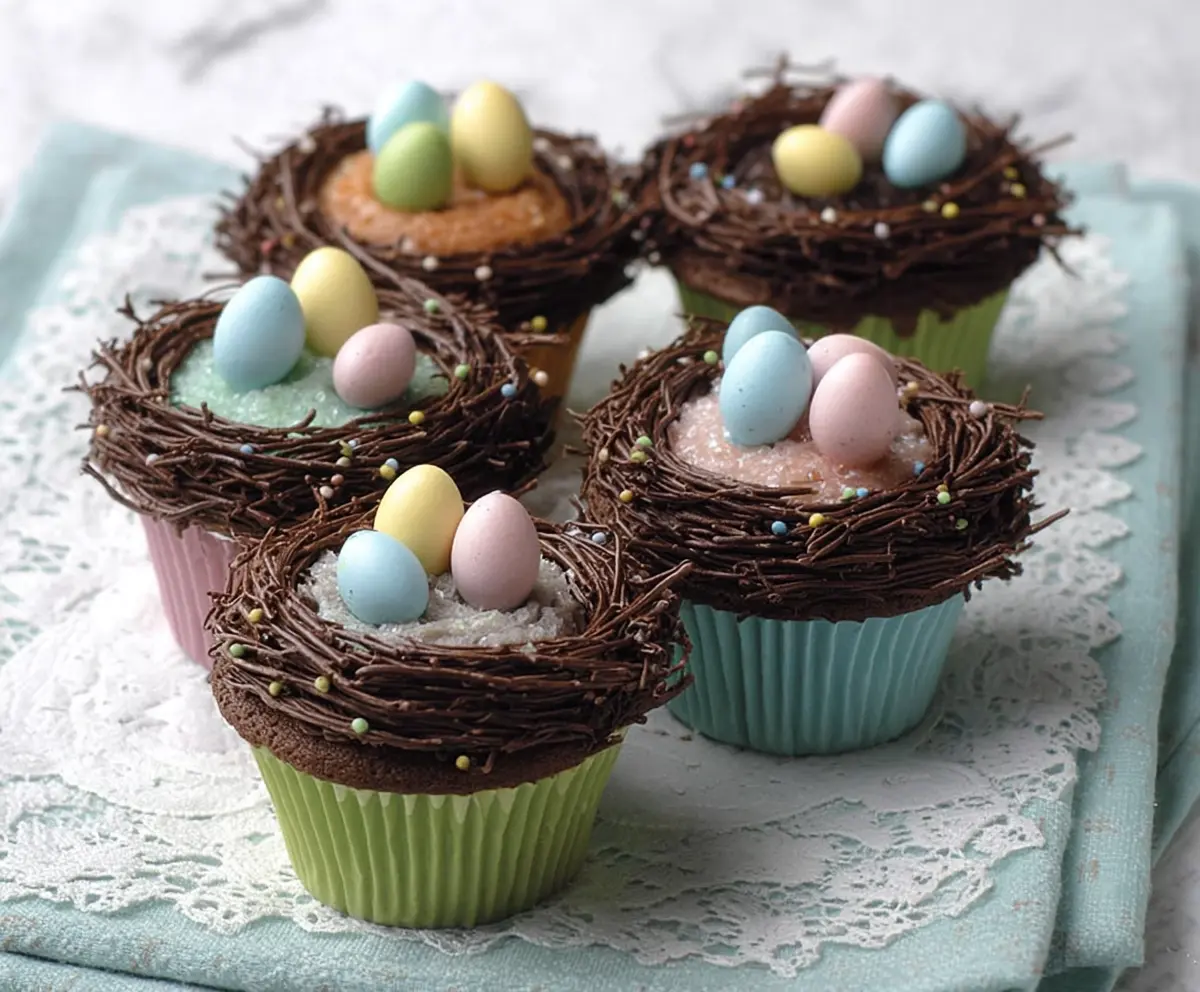
These fun Easter Egg Nest Cupcakes are the perfect treat for spring celebrations! Topped with fluffy frosting, they look just like little nests filled with colorful chocolate eggs.
Making these cupcakes is a blast! Kids love to help decorate, and who can resist that sweet topping? Trust me, they make any Easter gathering a whole lot more cheerful! 🐣
Key Ingredients & Substitutions
Cocoa Powder: Unsweetened cocoa is vital for a rich chocolate flavor in these cupcakes. If you need a lighter option, you can use Dutch-processed cocoa, which has a smoother flavor, but it’s not a direct substitute in recipes that need rising agents.
Buttermilk: This adds moisture and a slight tang. If you don’t have buttermilk, you can make a substitute by mixing 1/2 cup of milk with 1/2 tablespoon of vinegar or lemon juice. Let it sit for a few minutes, and it works just as well!
Unsalted Butter: I always use unsalted butter for better control over the overall saltiness of the cupcakes. If you only have salted butter, just reduce the amount of added salt in the recipe.
Chocolate or Candy Melts: You can use real chocolate or candy melts, but feel free to swap for white chocolate or even colored candy melts for a fun twist. They melt easily and can add a colorful look to your nests.
How Can You Ensure Your Cupcakes Rise Perfectly?
Getting those cupcakes to rise can sometimes be tricky! Here’s what you should pay attention to:
- Make sure your baking powder and baking soda are fresh. They lose potency over time, leading to flat cupcakes.
- Don’t overmix the batter once you add the flour. It can develop gluten, resulting in a dense texture.
- Fill your cupcake liners about 2/3 full to leave room for rising.
- Keep an eye on your bake time and start checking early. Each oven is different, and underbaking will cause them to collapse.
Following these tips should help you achieve perfect, fluffy cupcakes every time!
How to Make Easter Egg Nest Cupcakes
Ingredients You’ll Need:
For The Cupcakes:
- 1 cup all-purpose flour
- 1/2 cup unsweetened cocoa powder
- 1 tsp baking powder
- 1/2 tsp baking soda
- 1/4 tsp salt
- 1/2 cup unsalted butter, softened
- 3/4 cup granulated sugar
- 2 large eggs
- 1 tsp vanilla extract
- 1/2 cup buttermilk
For The Chocolate Frosting:
- 1/2 cup unsalted butter, softened
- 1 1/2 cups powdered sugar
- 1/4 cup unsweetened cocoa powder
- 2-3 tbsp milk or heavy cream
- 1 tsp vanilla extract
For The Nest Decoration:
- 1 cup melted chocolate or chocolate candy melts
- Mini chocolate chips or sprinkles for texture
For The Topping:
- Mini pastel-colored candy eggs (such as candy-coated chocolate eggs or speckled candy eggs)
- Multi-colored mini sprinkles (optional)
How Much Time Will You Need?
This delightful recipe takes about 30 minutes of prep time and 20-22 minutes of baking time. After that, you’ll want to let the cupcakes cool completely before decorating, which may take about 30 minutes. So, plan for around 1.5 hours from start to finish, plus extra time for the chocolate nests to set if needed!
Step-by-Step Instructions:
1. Preheat and Prepare:
Start by preheating your oven to 350°F (175°C). While that’s warming up, line a cupcake tin with paper liners. This makes it easy to lift out your cupcakes later!
2. Make the Cupcake Batter:
In one bowl, sift together the flour, cocoa powder, baking powder, baking soda, and salt. This ensures all the dry ingredients are mixed evenly. In a larger bowl, beat the softened butter and granulated sugar together until they are light and fluffy—that’s where all the flavor starts! Add the eggs one at a time, mixing well after each addition, and then stir in the vanilla extract. Now, add the dry ingredients to the butter mixture in two parts, alternating with the buttermilk. Start and end with the dry ingredients—mix just until everything is combined, but don’t overdo it!
3. Bake the Cupcakes:
Divide your batter evenly into the lined cupcake tin, filling each one about 2/3 full. Bake them in the preheated oven for 18-22 minutes. To check if they’re done, stick a toothpick in the center of a cupcake; it should come out clean. Once baked, remove them from the oven and let them cool completely on a wire rack.
4. Prepare the Chocolate Frosting:
In a medium bowl, beat the softened butter until creamy. Gradually start adding in the powdered sugar and cocoa powder, mixing well to avoid any lumps. Next, add the milk or heavy cream, a tablespoon at a time, until the frosting reaches the consistency you want—smooth but firm enough to hold its shape. Finally, stir in the vanilla extract and beat until fluffy!
5. Assemble the Nests:
Now it’s time to decorate! Spread or pipe a generous layer of your chocolate frosting on each cooled cupcake. To create a nest effect, add mini chocolate chips or small sprinkles around the edges of the frosting to give it texture.
6. Create the Nest:
In a microwave-safe bowl, melt the chocolate or candy melts. Stir every 30 seconds until it’s smooth—watch it closely to prevent burning! Using a fork or a piping bag, create twig-like lines or small nest shapes with the melted chocolate on a piece of parchment paper. Allow them to harden completely. You can also drizzle the melted chocolate straight onto the frosted cupcakes in circular shapes for nests and chill them in the fridge to set them more quickly.
7. Add Candy Eggs:
Once the nests have set, carefully place them on top of the frosted cupcakes. In each nest, arrange a cluster of those cute pastel mini candy eggs. If you feel festive, sprinkle a few colorful mini sprinkles around for extra fun!
8. Serve and Enjoy:
Let your cupcakes sit for a few minutes so everything can secure perfectly. They are now ready to be served at room temperature. Enjoy your delightful Easter Egg Nest Cupcakes with family and friends!
Can I Use All-Purpose Flour Instead of Cake Flour?
Absolutely! All-purpose flour works perfectly for this recipe, giving the cupcakes a nice, sturdy texture. Just make sure to sift it to keep the batter light and fluffy!
How Do I Store Leftover Cupcakes?
Store any leftover cupcakes in an airtight container at room temperature for up to 3 days. If you want to keep them longer, you can refrigerate them, but make sure they’re well sealed to prevent them from drying out.
Can I Substitute the Buttermilk?
Yes! If you don’t have buttermilk, you can make a quick substitute by mixing 1/2 cup of milk with 1/2 tablespoon of vinegar or lemon juice. Let it sit for about 5 minutes, and you’re good to go!
How Can I Make These Cupcakes Gluten-Free?
To make gluten-free cupcakes, simply substitute the all-purpose flour with a 1:1 gluten-free flour blend. Make sure it contains xanthan gum for the best texture!