
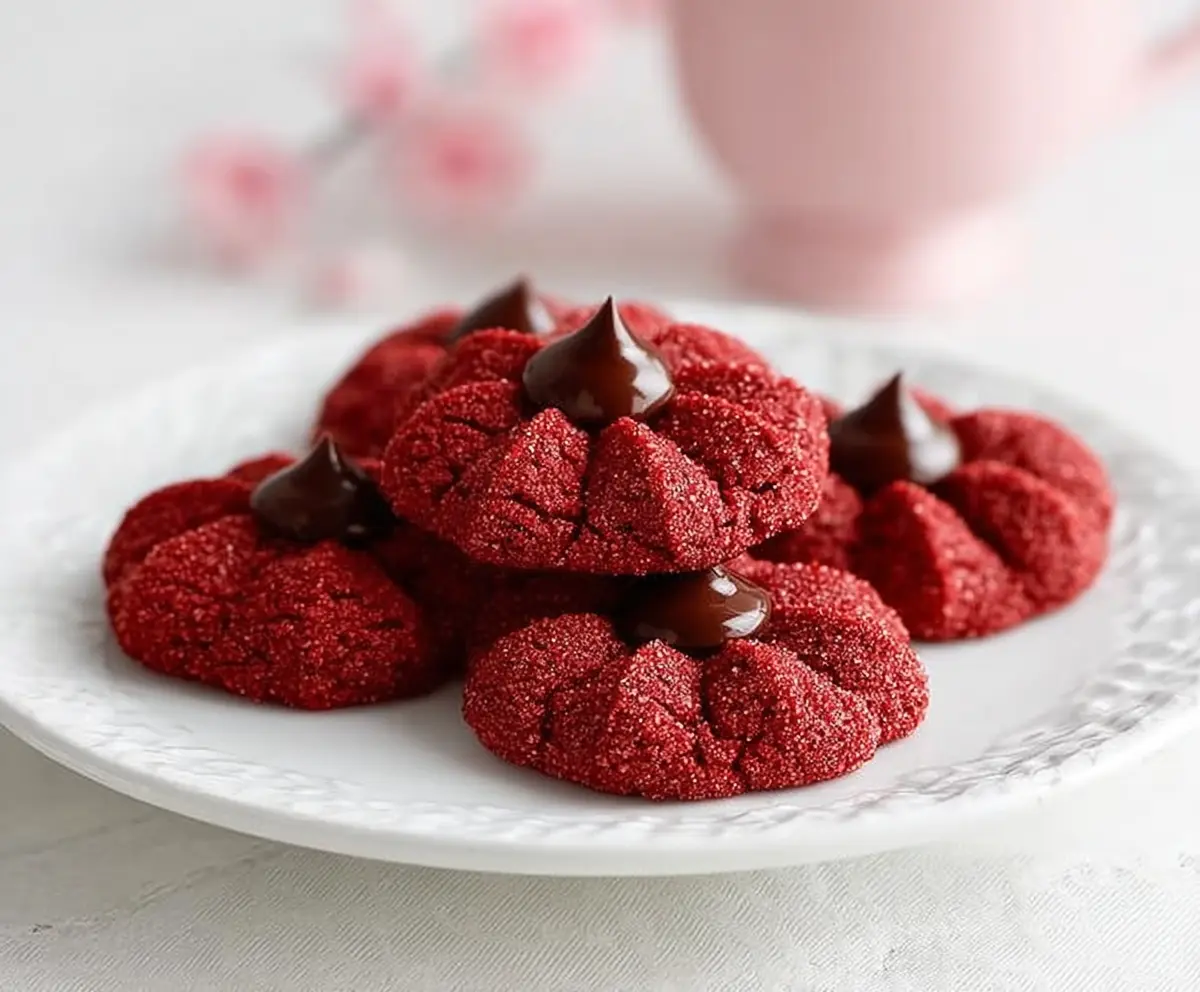
These cute cookies are a fun twist on classic red velvet! With their rich flavor and soft texture, each one is topped with a sweet Hershey’s chocolate kiss, bringing a delicious surprise.
Making these feels like baking a little piece of joy! I love how they look so fancy, but they’re super easy to whip up. They’re perfect for sharing or just for a tasty treat at home!
Key Ingredients & Substitutions
Red Velvet Cake Mix: This is the heart of the cookies. It provides the rich flavor and beautiful color. If you want to make these from scratch, use cocoa powder and buttermilk instead. You can also use a gluten-free cake mix if needed!
Vegetable Oil: This helps keep the cookies soft and moist. You can substitute with melted coconut oil or melted unsalted butter for a different flavor.
Hershey’s Chocolate Fudge Syrup: This adds a fun, chocolatey swirl on top. If you prefer, chocolate frosting can be used instead, creating a richer topping. Homemade chocolate ganache could also work well if you’re feeling adventurous!
Red Sugar Sprinkles: These add that holiday feel! If you can’t find them, regular granulated sugar or colored sanding sugar can be used instead. You could even skip the sprinkles for a simpler look.
How Do I Get My Cookies to Stay Soft?
To keep these cookies soft and chewy, the baking time is key. Bake just until they look set but are not browning around the edges. Make sure you don’t overbake; a soft center is what makes these cookies delightful!
- Preheat your oven for the correct temperature.
- Once baked, take them out while they still look a bit underbaked. They’ll firm up as they cool.
- Press the chocolate kiss into the cookie as soon as they come out of the oven, which helps to create that gooey center.
Hershey’s Red Velvet Blossoms Cookies
Ingredients You’ll Need:
For the Cookies:
- 1 box red velvet cake mix (about 15.25 oz)
- 2 large eggs
- 1/3 cup vegetable oil
For the Topping:
- 1 container (8 oz) Hershey’s Chocolate Fudge Syrup (or chocolate frosting can be used as an alternative)
- Red sugar sprinkles (for rolling cookies)
- Red nonpareils or colored sugar crystals (for decorating)
How Much Time Will You Need?
This recipe will take about 15 minutes to prepare, plus about 10 minutes to bake. Allow some time for cooling as well—about 30 minutes—before adding the topping. In total, set aside approximately 55 minutes for the entire process!
Step-by-Step Instructions:
1. Preheat the Oven:
First thing, preheat your oven to 350°F (175°C). While that’s heating up, line your cookie sheets with parchment paper or silicone baking mats to keep those cookies from sticking!
2. Mix the Dough:
In a large mixing bowl, combine the red velvet cake mix, eggs, and vegetable oil. Stir everything together until it’s well blended and smooth. This is where the magic starts!
3. Shape the Cookies:
Now it’s time to have some fun. Get the red sugar sprinkles ready in a shallow bowl. Roll the dough into 1-inch balls, then roll each ball through the red sugar until it’s fully coated. This gives your cookies a lovely sparkle!
4. Arrange on Cookie Sheets:
Place the dough balls about 2 inches apart on your prepared cookie sheets. They will spread a bit while baking, so give them space to grow!
5. Bake the Cookies:
Pop the cookie sheets in the oven and bake for about 8 to 10 minutes. You want them set but just starting to look firm—avoid browning them too much!
6. Add the Chocolate Kisses:
As soon as the cookies come out of the oven, immediately press a Hershey’s Kiss into the center of each cookie. The cookies may crack slightly but that’s all right; it adds to their charm!
7. Cool the Cookies:
Let the cookies cool completely on the baking sheets placed on wire racks. This should only take about 30 minutes. Patience is key here!
8. Pipe the Topping:
Once cooled, grab a piping bag fitted with a star tip (or you can simply use a zip-lock bag with the corner snipped off) to pipe a swirl of chocolate fudge syrup (or frosting) on top of each Hershey’s Kiss. Yum!
9. Decorate and Finish:
To make them extra special, sprinkle some red nonpareils or colored sugar crystals on top of the chocolate swirl. These little touches make the cookies festive!
10. Enjoy Your Creation:
Now the best part—serve these delightful cookies and enjoy the amazing rich chocolatey flavor they bring. Perfect for sharing or just a treat for yourself!
These blissful red velvet blossom cookies are not only beautiful but also wonderfully tasty, making them a favorite for any occasion!
Can I Use a Different Cake Mix?
Absolutely! You can use chocolate or vanilla cake mix if you prefer a different flavor. Just keep in mind that it will change the overall look and taste of the cookies.
How Do I Store Leftover Cookies?
Store any leftover cookies in an airtight container at room temperature for up to 3 days. For longer storage, you can freeze them for up to a month. Just make sure to separate layers with parchment paper to prevent sticking!
Can I Make These Cookies Gluten-Free?
Yes! Simply use a gluten-free red velvet cake mix instead of regular. The other ingredients are typically gluten-free as well, but double check the labels to be sure!
What If I Don’t Have Red Sprinkles?
No worries! You can use regular granulated sugar or any other colored sanding sugar you have on hand. They will still look great and taste delicious!