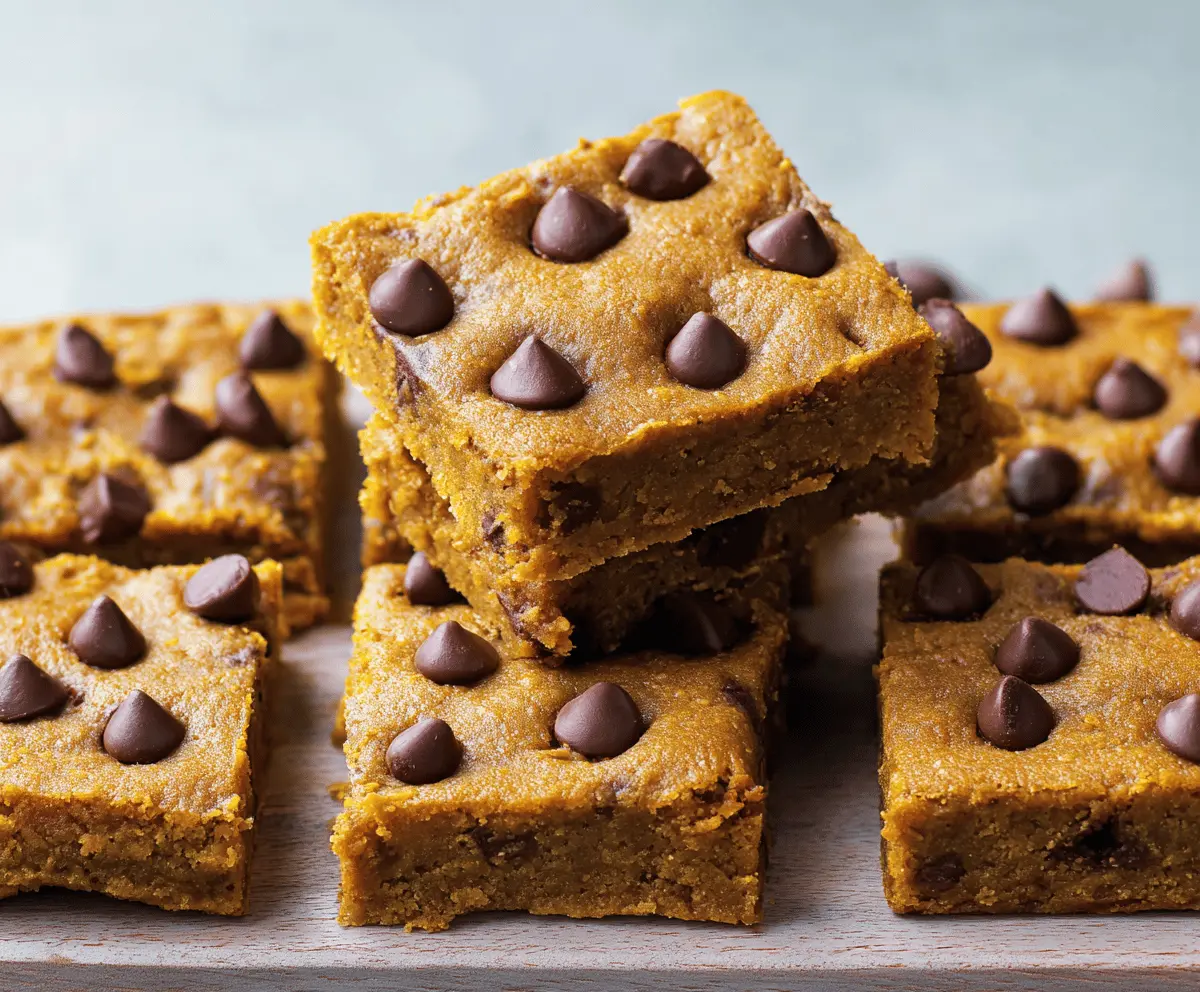
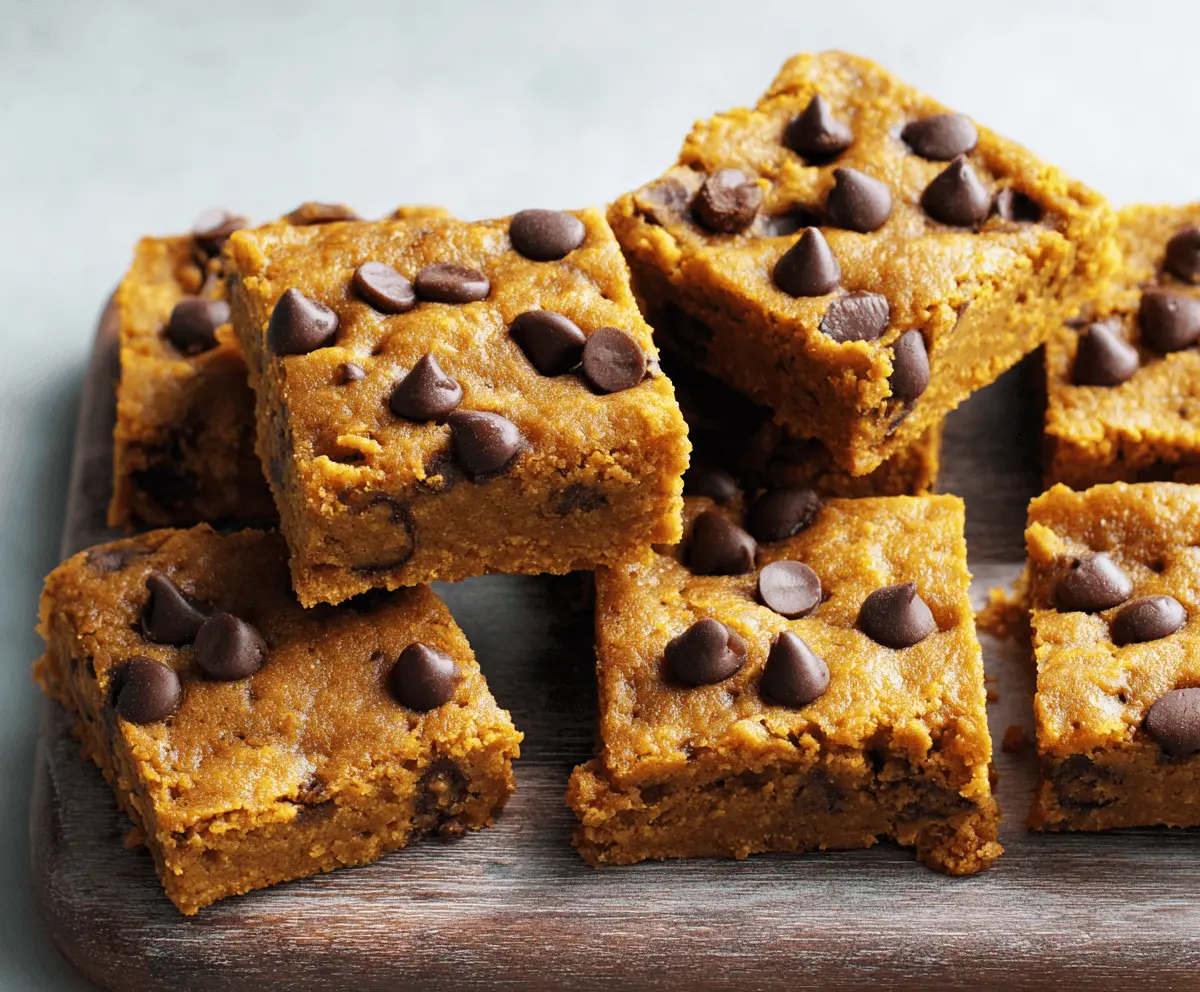
These pumpkin chocolate chip bars are a tasty treat! They combine smooth pumpkin with sweet chocolate chips for a perfect fall snack. Plus, they’re super easy to make!
Who doesn’t love a little pumpkin spice and chocolate? I can’t resist having one with my coffee. Make sure to share (or not) — I won’t tell! 😄
Key Ingredients & Substitutions
Pumpkin Puree: You can use canned pumpkin puree for convenience or make your own by roasting and blending fresh pumpkin. Just make sure it’s pure pumpkin, not pumpkin pie filling!
Butter: Unsalted butter is best as it allows you to control the saltiness. If needed, coconut oil or a dairy-free butter substitute works great for a dairy-free version.
Brown Sugar: Light brown sugar gives a nice flavor, but dark brown sugar works too for a deeper molasses taste. If you prefer, coconut sugar is a good alternative for a healthier option.
Flour: All-purpose flour is standard, but you can substitute with a 1:1 gluten-free flour blend if you need a gluten-free bar. Alternatively, almond flour can provide a nutty flavor.
Chocolate Chips: Semi-sweet chocolate chips are delicious, but feel free to use dark chocolate or even white chocolate for a different twist. You can also use dairy-free chocolate chips for a vegan option!
How Do I Get My Bars to Be Perfectly Moist and Flavorful?
The key to moist pumpkin chocolate chip bars is the right balance of wet and dry ingredients. Make sure you mix the wet ingredients well, so they are combined evenly. Here are some steps to ensure success:
- Mix your wet ingredients (pumpkin, butter, egg, vanilla, and sugar) thoroughly for flavor.
- Gently fold in the dry ingredients — don’t overmix, just stop when you see no more flour.
- Checking for doneness is important. A toothpick should come out with a few moist crumbs, not completely dry.
Let them cool completely before cutting to keep them from falling apart, and enjoy a slice of fall in every bite! 🌟
How to Make Pumpkin Chocolate Chip Bars
Ingredients You’ll Need:
- 1 cup pumpkin puree (canned or fresh)
- 1/2 cup unsalted butter, melted
- 1 cup brown sugar, packed
- 1 large egg
- 1 teaspoon vanilla extract
- 1 1/4 cups all-purpose flour
- 1/2 teaspoon baking powder
- 1/2 teaspoon baking soda
- 1 teaspoon ground cinnamon
- 1/2 teaspoon ground nutmeg
- 1/4 teaspoon ground ginger
- 1/4 teaspoon salt
- 1 cup semi-sweet chocolate chips (plus extra for topping)
How Much Time Will You Need?
You’ll need about 10 minutes to prepare the ingredients and mix everything together, followed by 25-30 minutes of baking time. Then, let them cool for about 15 minutes before cutting. In total, you can expect to spend around 1 hour before they’re ready to enjoy!
Step-by-Step Instructions:
1. Preheat the Oven:
Set your oven to 350°F (175°C). This way, it’ll be just the right temperature when you’re ready to bake. Line an 8×8-inch baking pan with parchment paper to make removing the bars easier later, or just grease the pan if you prefer.
2. Mix the Wet Ingredients:
In a large bowl, combine the melted butter, brown sugar, pumpkin puree, egg, and vanilla extract. Mix everything together until it’s nice and smooth. This is where all the delicious pumpkin flavor comes from!
3. Combine the Dry Ingredients:
In another bowl, whisk together the flour, baking powder, baking soda, cinnamon, nutmeg, ginger, and salt. This will ensure everything is mixed evenly for perfect flavor in every bite.
4. Combine Wet and Dry Ingredients:
Gradually add the dry mixture to the wet mixture, stirring gently. Be careful not to over-mix; just stop when you no longer see any flour. This helps keep the bars nice and tender.
5. Add the Chocolate Chips:
Now it’s time to fold in the chocolate chips. Mix them evenly into the batter so every bite has that rich chocolatey goodness!
6. Pour and Spread in the Pan:
Pour the batter into your prepared baking pan. Use a spatula to spread it out evenly to make sure it bakes evenly.
7. Add Extra Chocolate Chips:
Sprinkle a few more chocolate chips on top of the batter for extra sweetness. They’ll create a delightful look and even more chocolate flavor once baked.
8. Bake to Perfection:
Place the pan in the oven and bake for 25-30 minutes. Check for doneness by inserting a toothpick in the center; it should come out mostly clean with just a few moist crumbs.
9. Cool Before Cutting:
Once baked, take them out of the oven and let them cool in the pan on a wire rack. Cooling completely will help the bars set and make them easier to cut into squares.
10. Serve and Enjoy:
Once cooled, cut the bars into squares and enjoy with family and friends! These pumpkin chocolate chip bars make for a delightful fall treat any time of the year.
With their moist and dense texture combined with hints of warm spices and rich chocolate, these bars are sure to please your taste buds. Enjoy! 🍂🍫
Can I Use Fresh Pumpkin Instead of Canned?
Absolutely! If you choose to use fresh pumpkin, make sure to cook it until tender, then puree it until smooth. About 1 small pumpkin yields around 1 cup of puree after cooking.
How Should I Store Leftover Bars?
Store any leftovers in an airtight container at room temperature for up to 3 days. For longer storage, refrigerate them for up to a week. You can also freeze them for up to 3 months; just be sure to wrap them tightly!
Can I Make This Recipe Gluten-Free?
Yes! Simply substitute the all-purpose flour with a 1:1 gluten-free flour blend. This should keep the texture similar while accommodating those with gluten sensitivities.
How Can I Tell When the Bars Are Done Baking?
When your bars are baking, insert a toothpick in the center. If it comes out with a few moist crumbs (not wet batter), they’re done! Remember, overbaking can lead to dry bars, so check them a bit early if needed.